
Do you love the sweet buttery taste of roasted garlic? Learn how to roast garlic at home and you can enjoy this delicious (and healthy!) treat whenever you want.
Recipe review
Why you’ll love it: You’ll find that it’s super easy to roast garlic and there are so many ways to enjoy it.
How long will it take: A few minutes to prepare and 50 to 55 minutes to roast
Equipment you will need: Oven, small baking paper
Dishes: As many heads as you want

Roasting raw garlic transforms it, softening the pungent flavor into a sweet, caramelized delight. Even if you (or your stomach) aren’t big fans of garlic, roasted garlic might change your mind.
Think about the difference between raw onions and caramelized onions. The change that occurs when you cook raw onions on low heat is almost magical. The eye-popping spicy raw onion turns into a sweet delight. Raw onions don’t look like caramelized onions and certainly don’t taste like raw onions, right? (Side note: If you like caramelized onions – be sure to check out our French Onion Soup and Spring Chimichanga.)
Roasted garlic is the same. The strong taste of the garlic softens. It becomes almost sweet tasting, still a bit garlicky, but in a good way. The texture is soft and creamy, almost buttery.
Maybe I’m preaching to the choir! Maybe you already love roasted garlic but just don’t know how to make it. This tutorial post can help you get started. Keep reading for lots of ways to use your roasted garlic too.
post Scriptum. If you are a garlic lover, be sure to try the Spicy Garlic Shrimp. The crispy pieces of the fried garlic are so good!
about this recipe
It’s really very easy to roast garlic. If you happen to have the oven for something else, wrap a head of garlic and roast it right along with it. Baked potatos? Why not roast a head of garlic too? Roasted garlic is a perfect addition to baked potatoes.
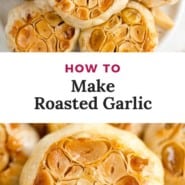
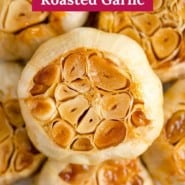
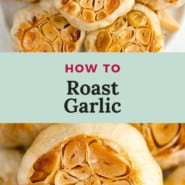
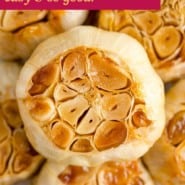
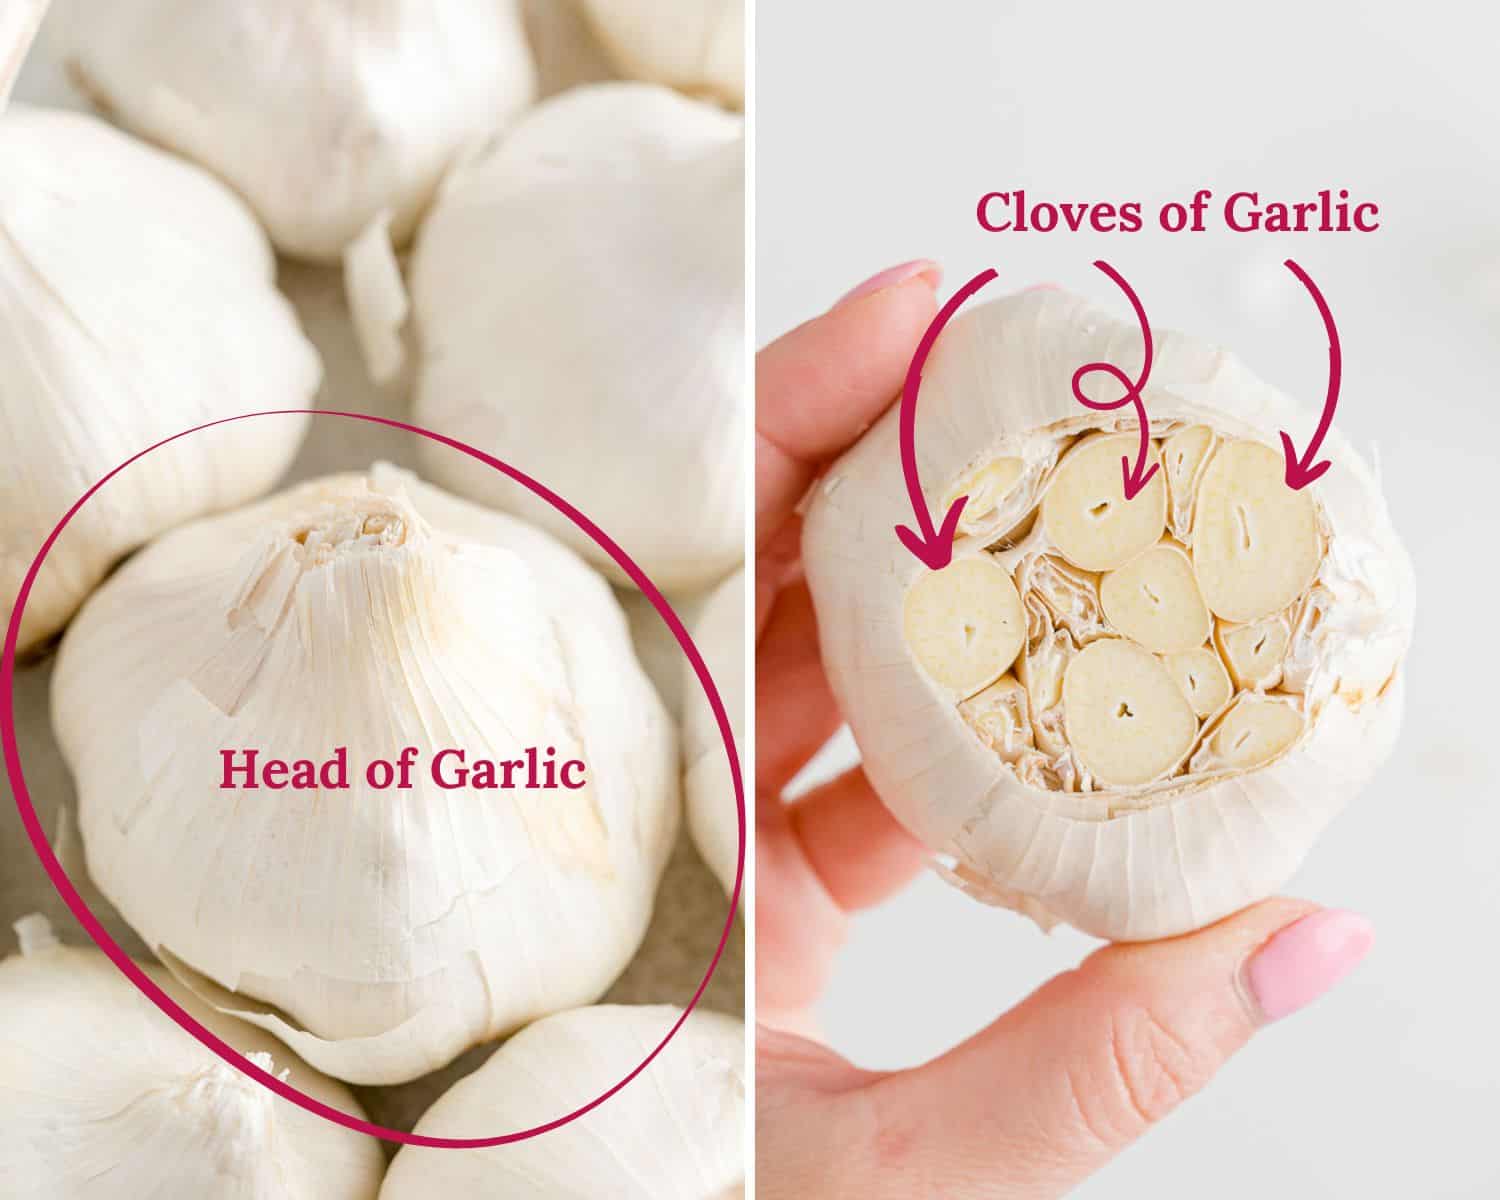
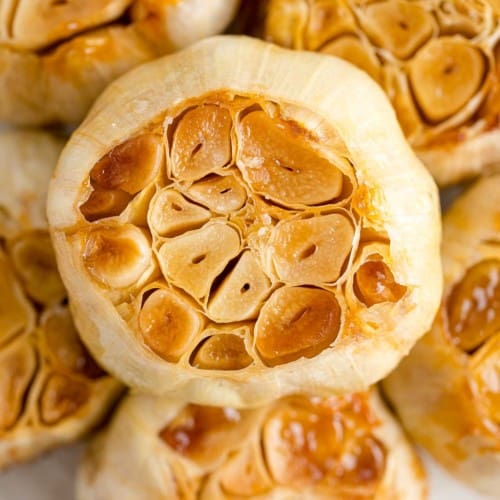
Heads of garlic are really cool. Slice off about a quarter of an inch from the top of the head (opposite the tip of the root), and you’ll see fifteen to twenty cloves all nestled together, perfectly packed in the paper wrapper.
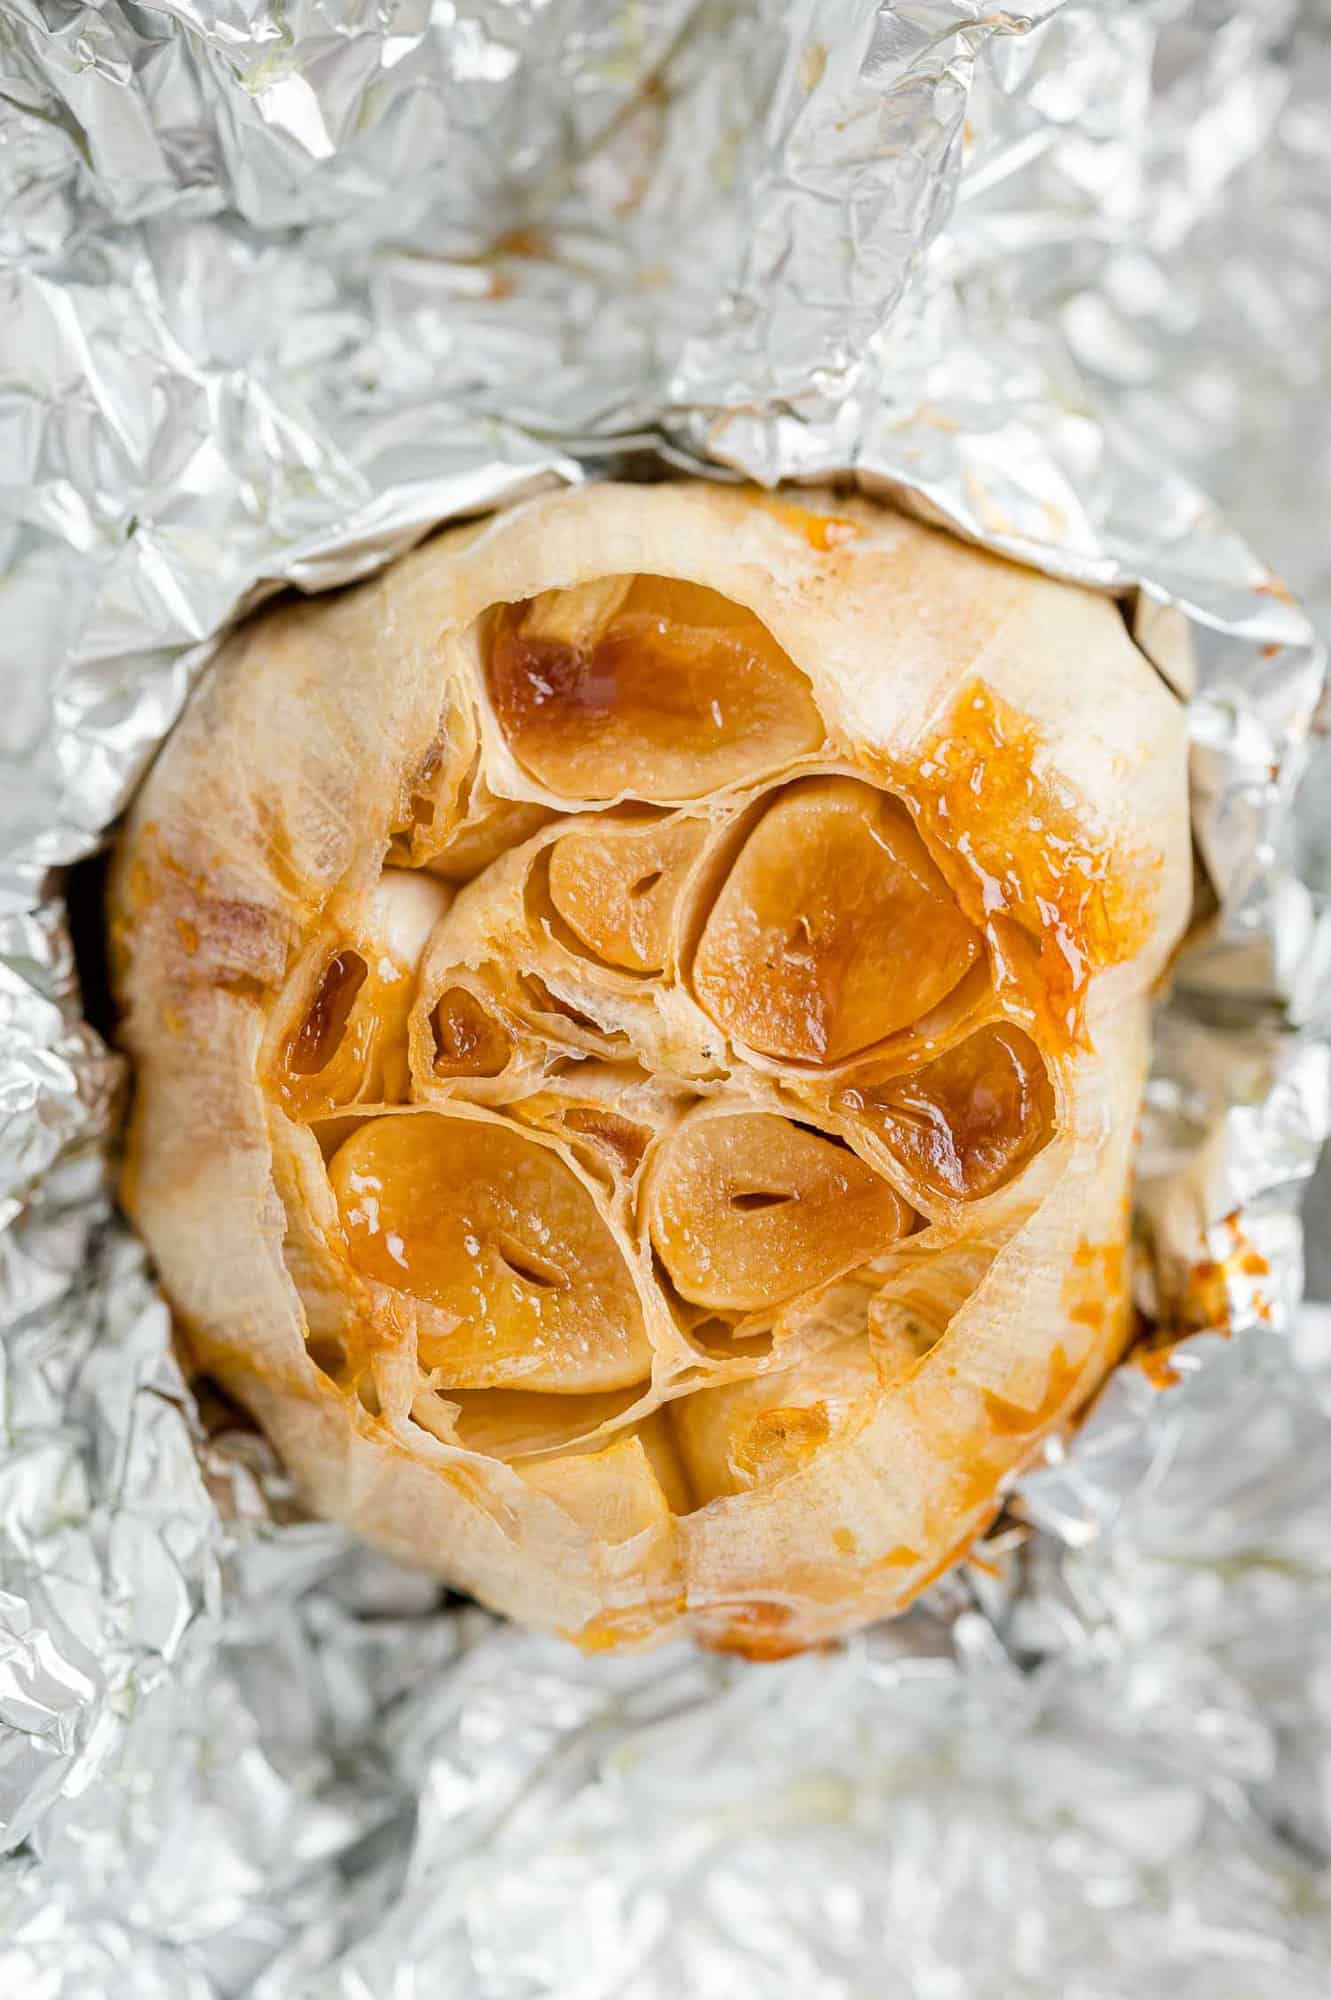
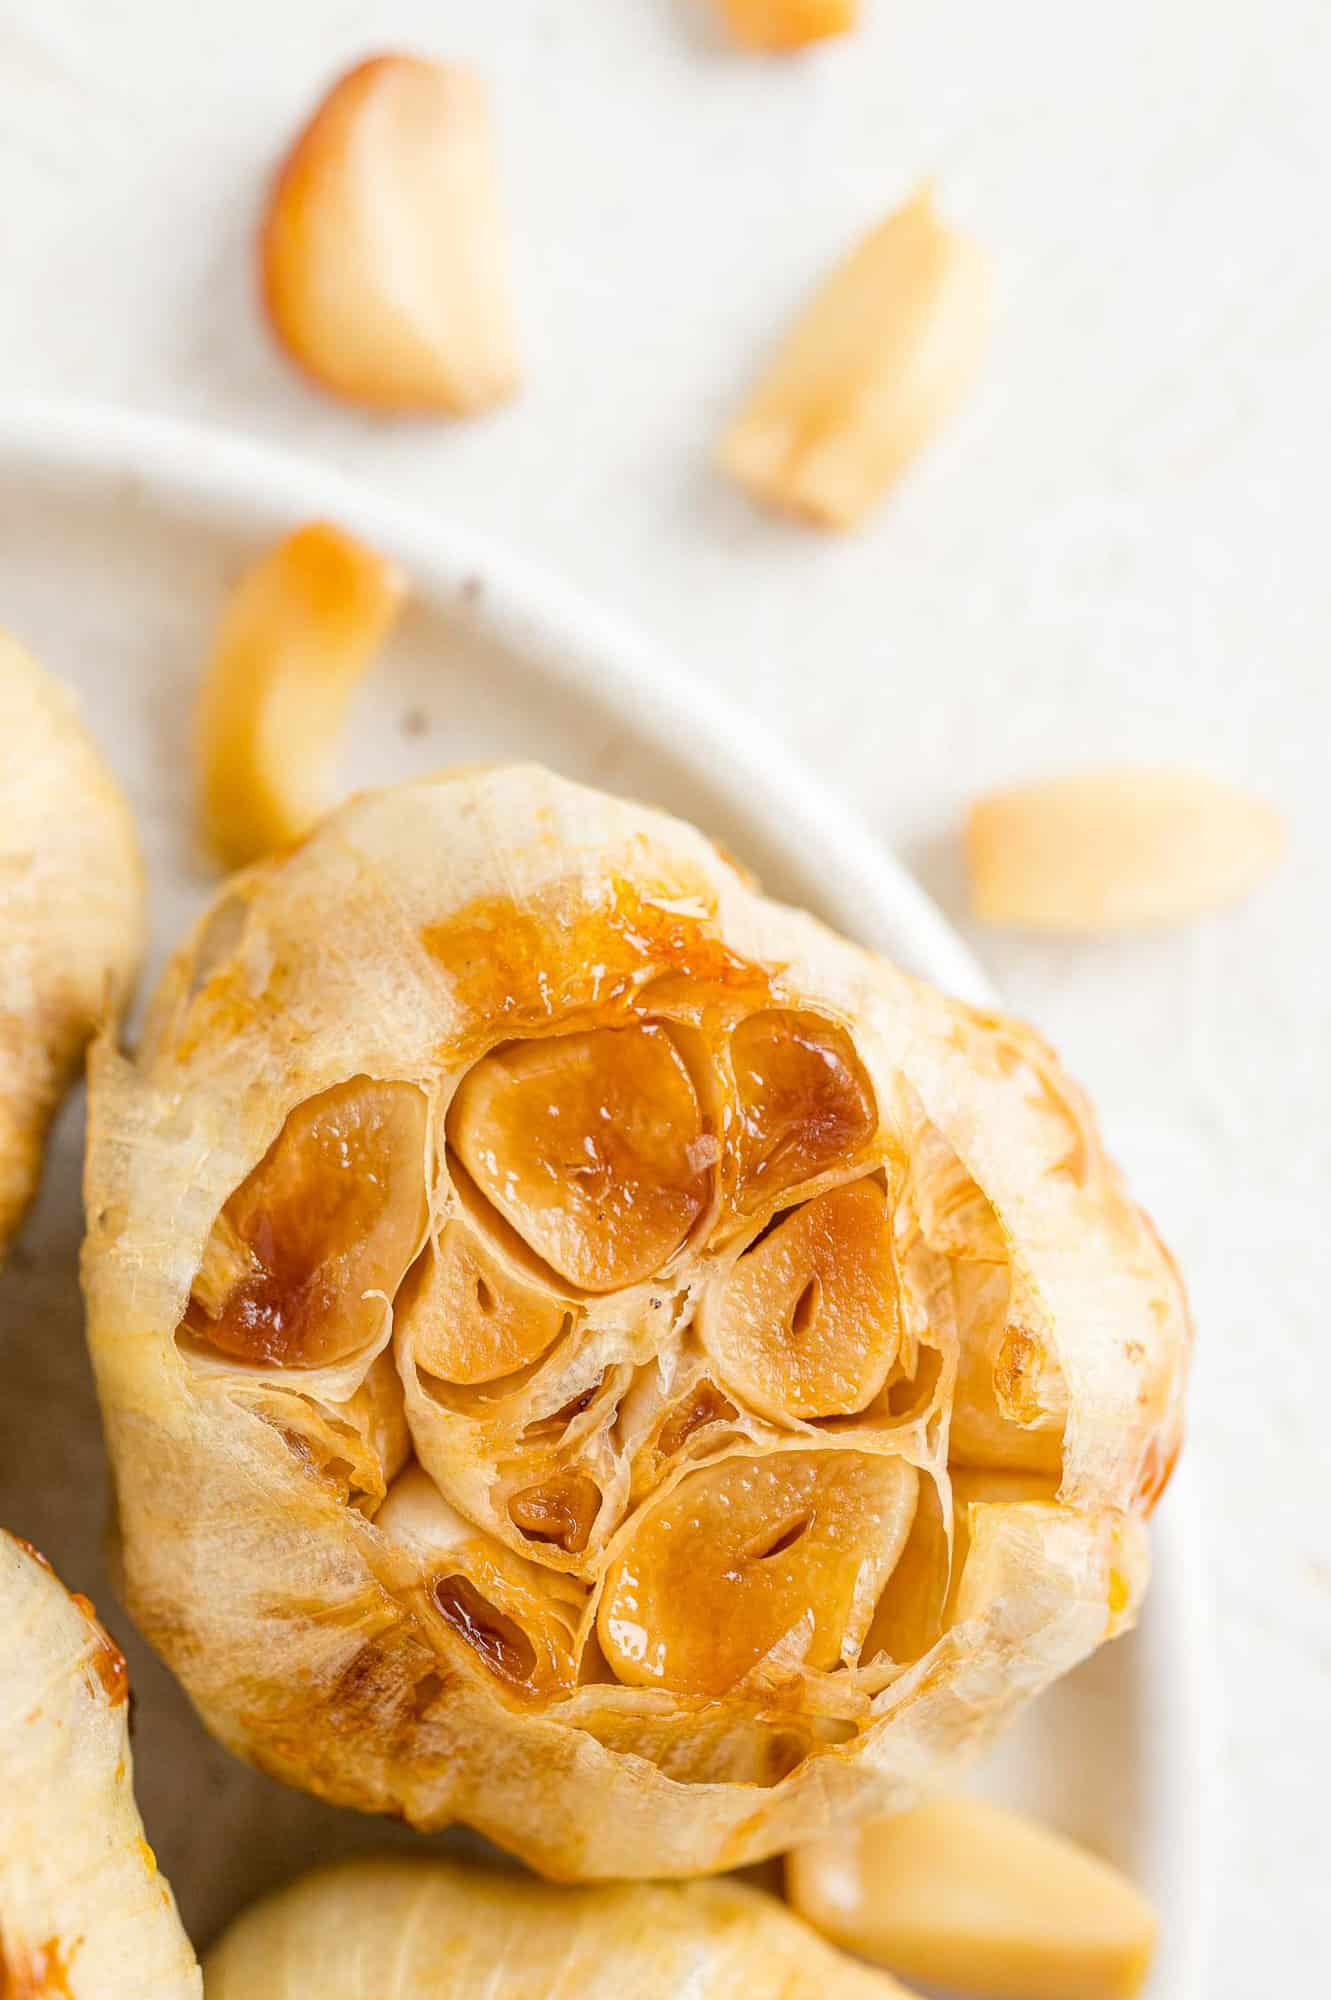
When the head is roasted, the clove takes on a beautiful shade of golden brown. The aroma is wonderful. the nail separates easily; They still have an outer layer that is not edible. At this point, you can carefully peel them off to keep the nail intact or simply squeeze the inside right out of the shell.
I’ll go through the instructions here to get you started and hopefully answer any questions you may have. Look for the recipe card below for specific instructions and nutritional information.
No IQ
Confused about the nomenclature of garlic? Is it a nail or a head? What is the difference?
Garlic is a light bulbs that grows underground. It has long green leaves that are removed when the garlic is harvested and dried.
When you buy fresh garlic, it is dried head the day before yesterday. Its color is whitish, with layers of paper wrapping. There will be a root tip, with short dry root tendrils attached. The other end is where the leaves were attached.
When you peel back the papery outer layer from the head, you’ll find some cloves Variable size packed together. Each nail is wrapped in skin with paper.
Most recipes call for cloves of garlic. To use fresh garlic, remove the papery skin from the clove before slicing, mincing, or pressing with a garlic press.
what do you need
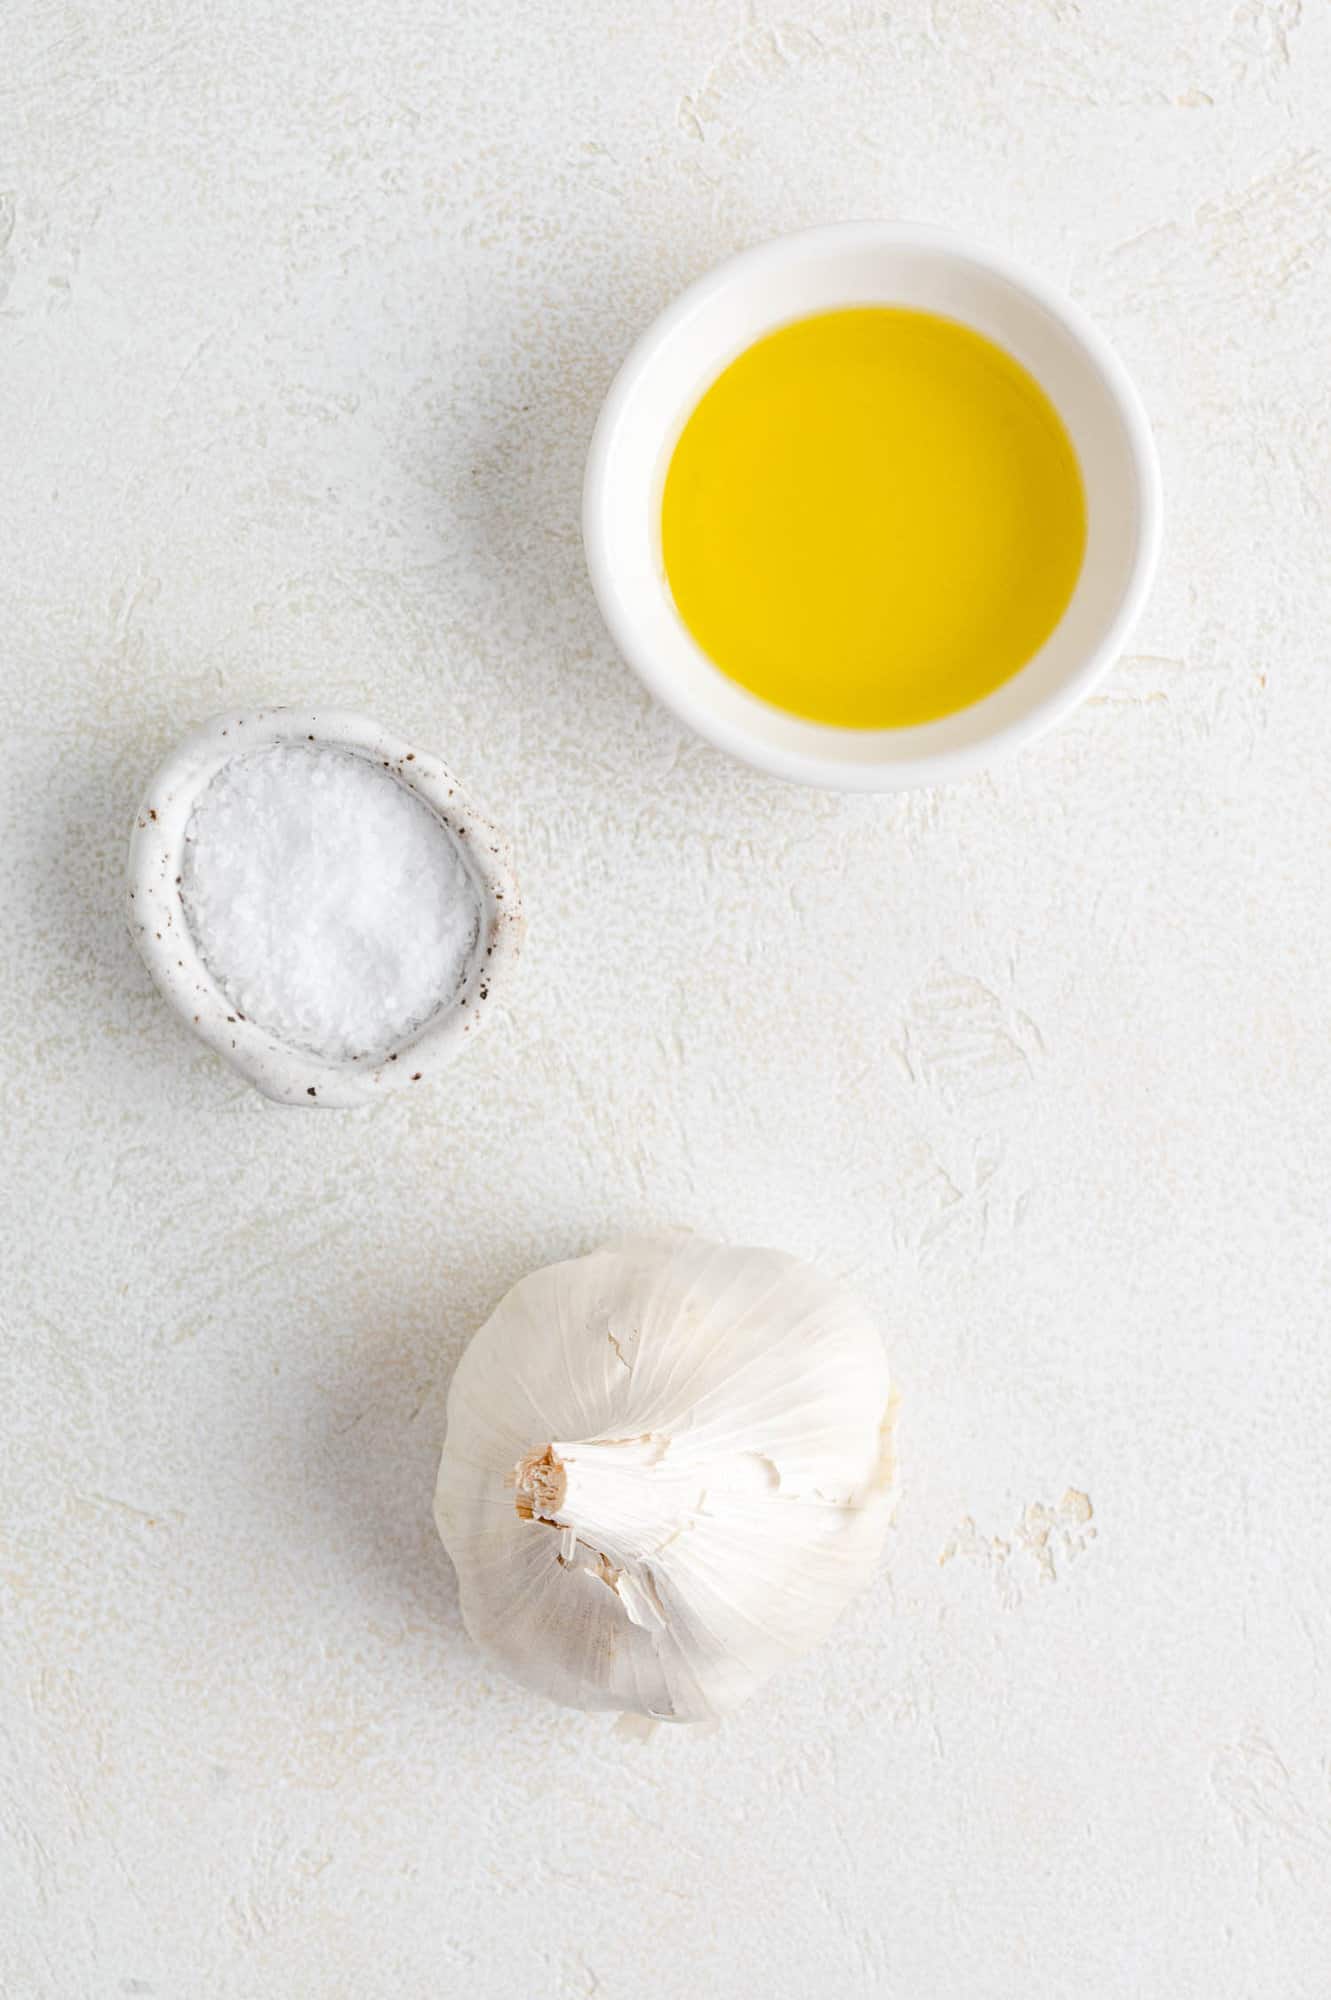
- A whole head of garlic: The recipe is written for one head of garlic, but usually it makes the most sense to roast several heads at the same time. The roasted garlic can be refrigerated or frozen.
- Olive oil: You just need to drizzle a little on top of the head of garlic before roasting it, anywhere from a teaspoon to a tablespoon.
- Kosher salt: Salt is optional but like everything else, roasted garlic tastes a little better with a little salt.
- aluminium foil: The heads are wrapped in aluminum foil for roasting. If you prefer, parchment paper can be substituted, but it doesn’t do a good job of trapping the steam with the garlic.
How to roast garlic
Turn on the oven to preheat. You will need a small baking sheet and foil or parchment paper. It’s up to you how many heads you want to roast, one or several.
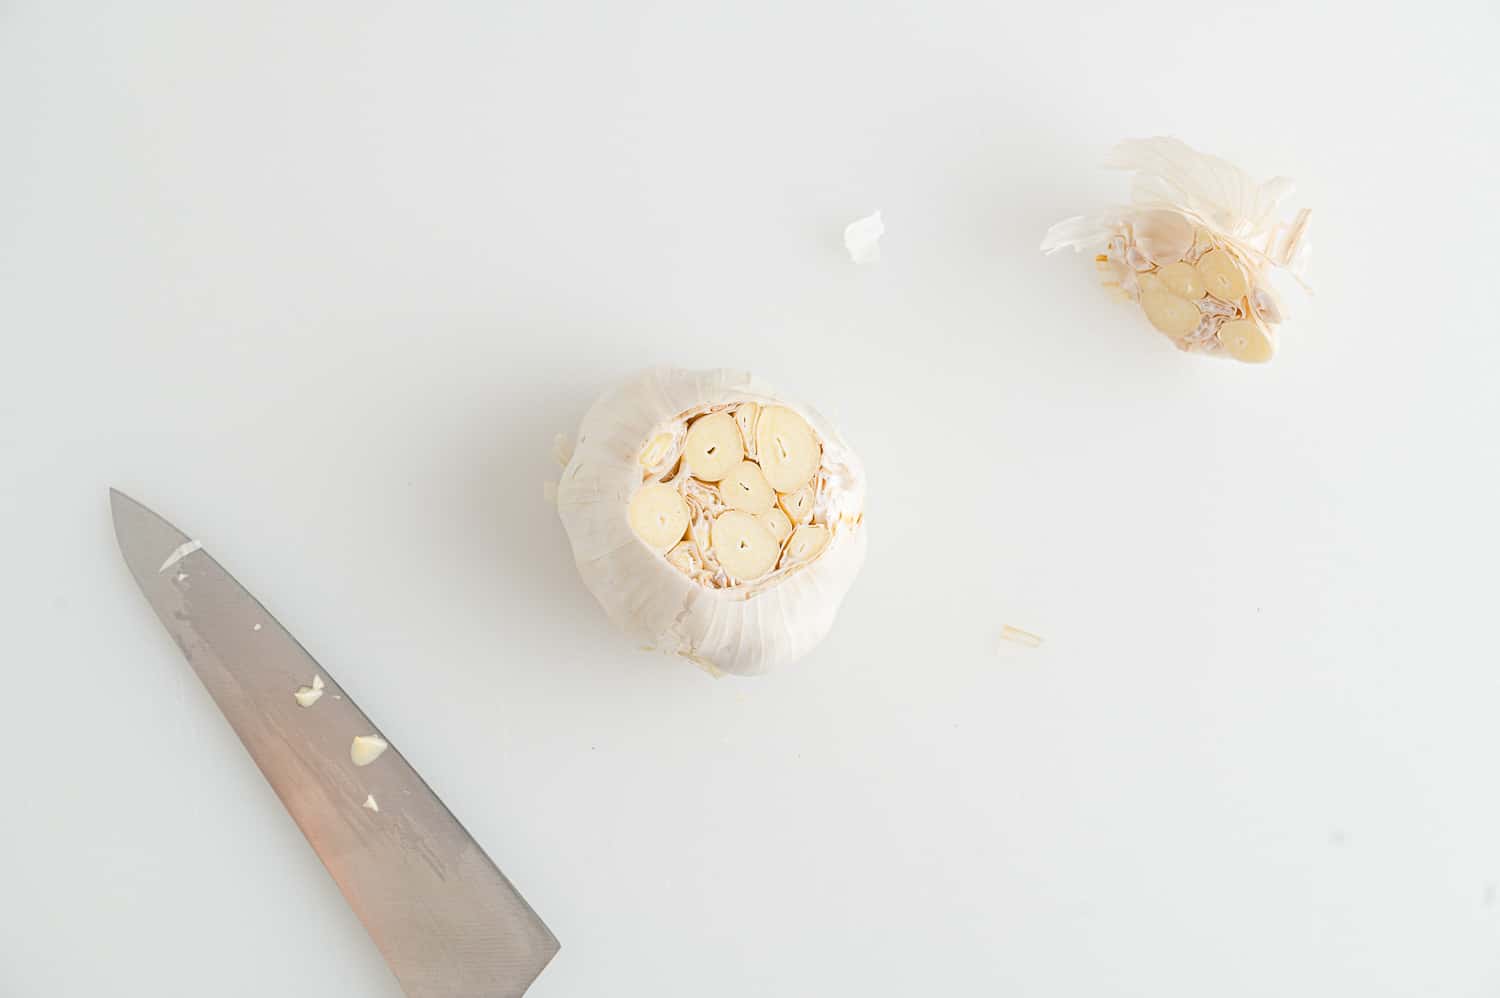
Prepare your garlic. With a very sharp knife, cut the tops off the heads. What is the upside? At the flatter end of the garlic are remnants of the roots, a top knot of little stringy things. Leave this end.
The top of the head of garlic is where the leaves originally grew. It reaches a certain point and you can see several layers of the wrapping paper. That’s the end you slice off, about a quarter of an inch or so. You should be able to see the nail separating inside.
Place the individual heads on a small sheet of aluminum foil or a square of parchment paper. Drizzle over a small amount of olive oil, and if desired, sprinkle a little kosher salt.
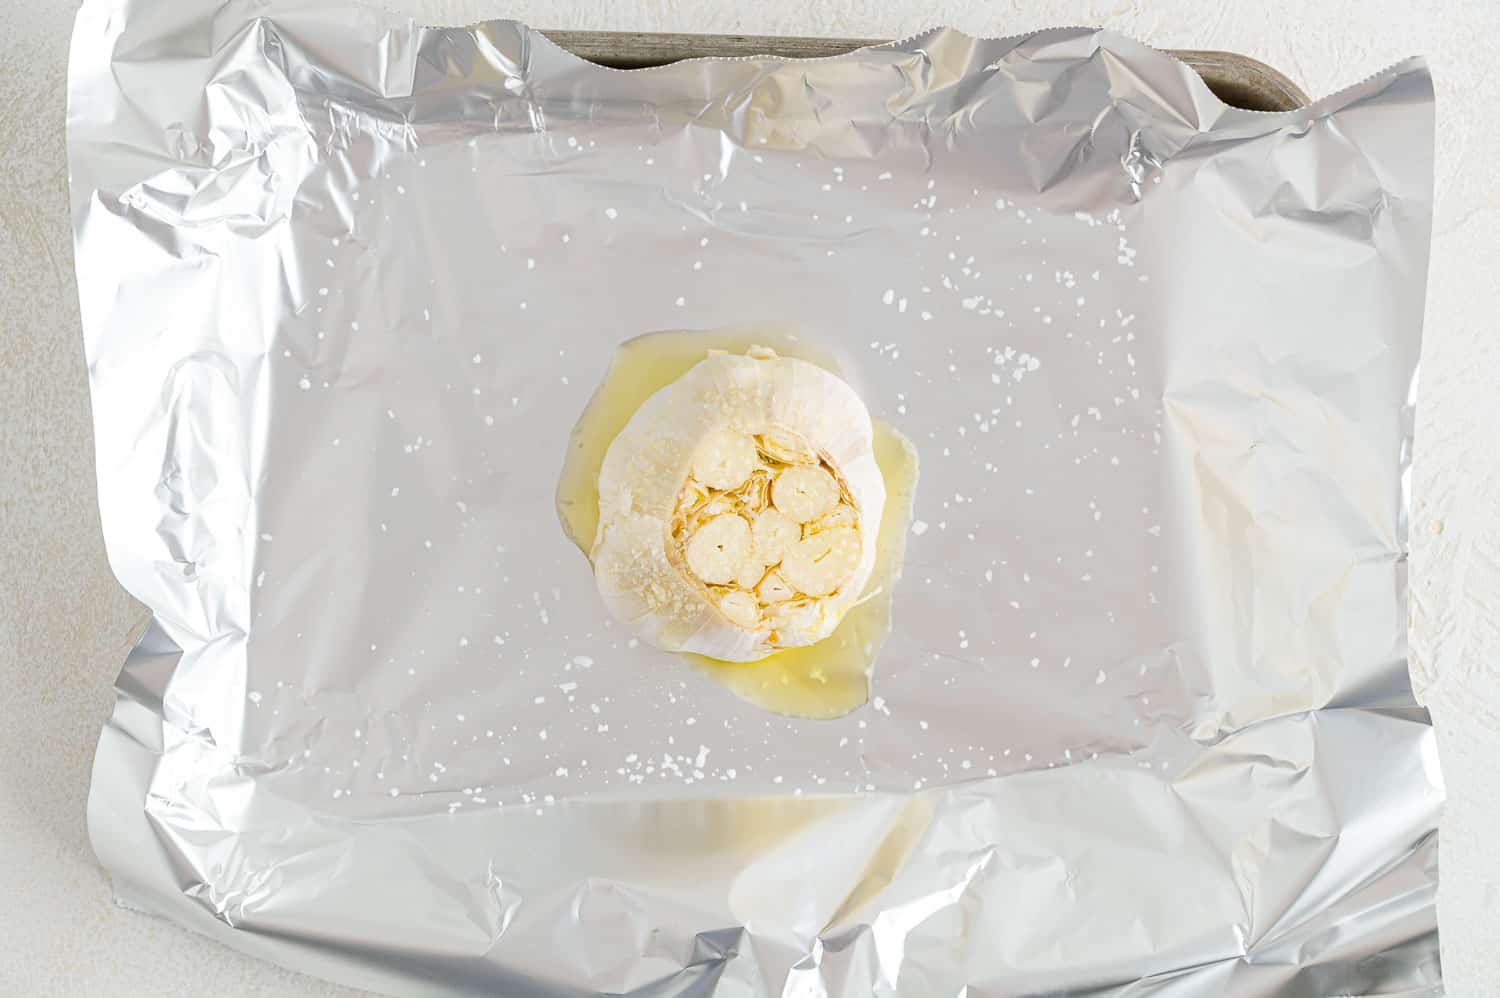
Wrap each head separately. The wrap retains the moisture that helps cook the garlic. This also prevents the garlic from getting too brown. If you’re using foil, just wrap it around the head, with the seams up. If you are using parchment paper, gather the ends and tie them together with butcher’s twine or kitchen twine.

Roast the heads of garlic until soft and golden, about 50 to 60 minutes.
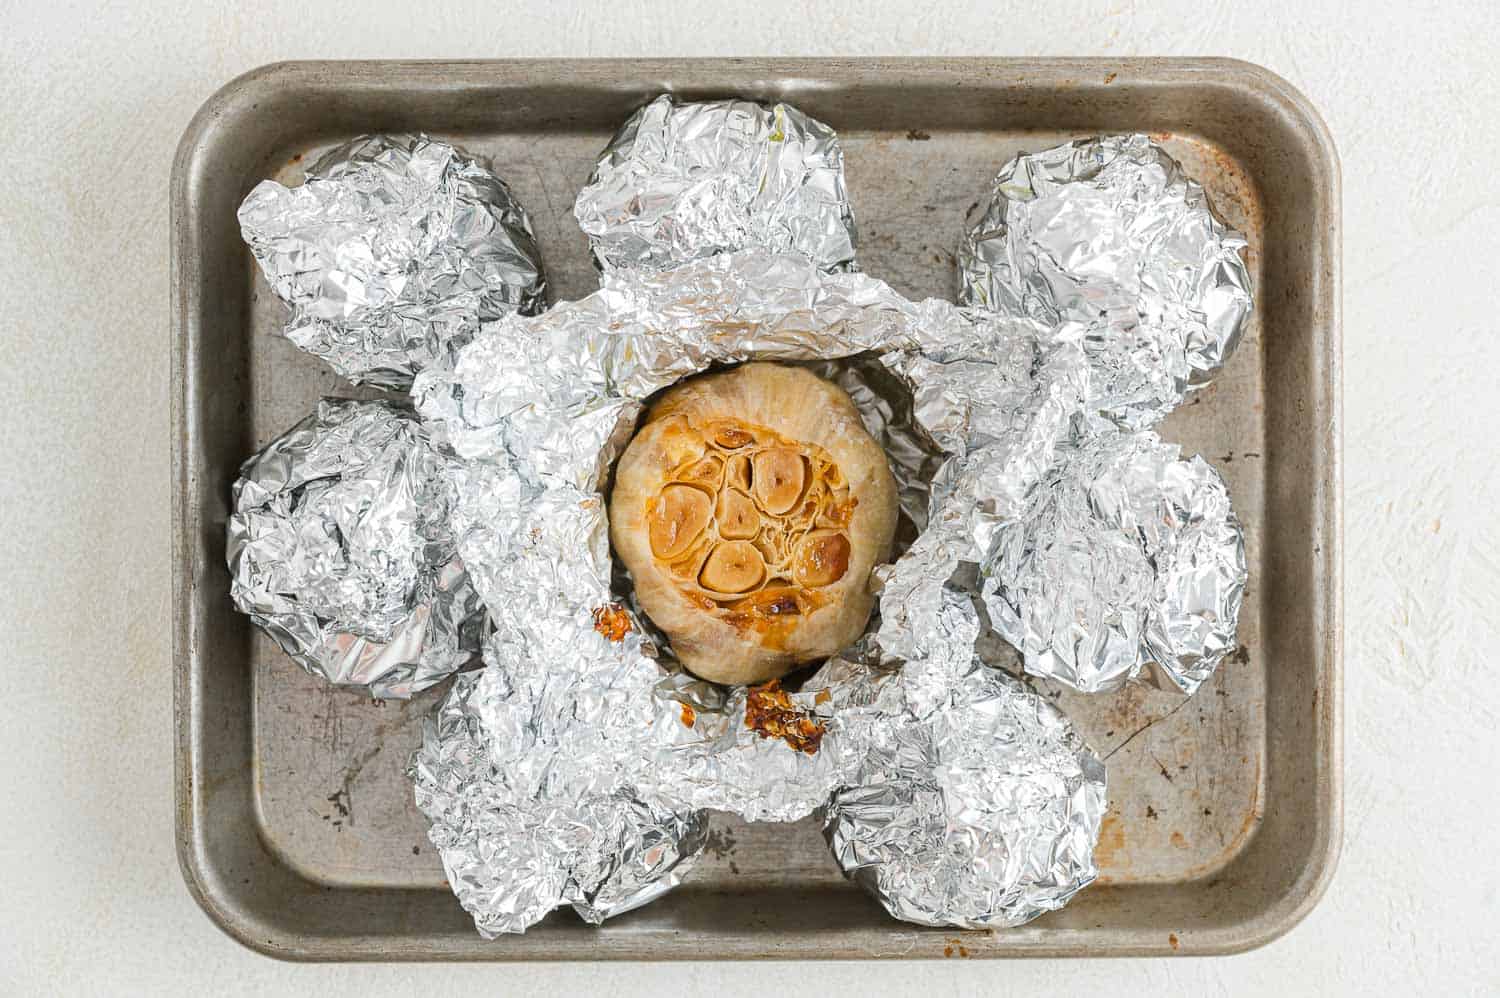
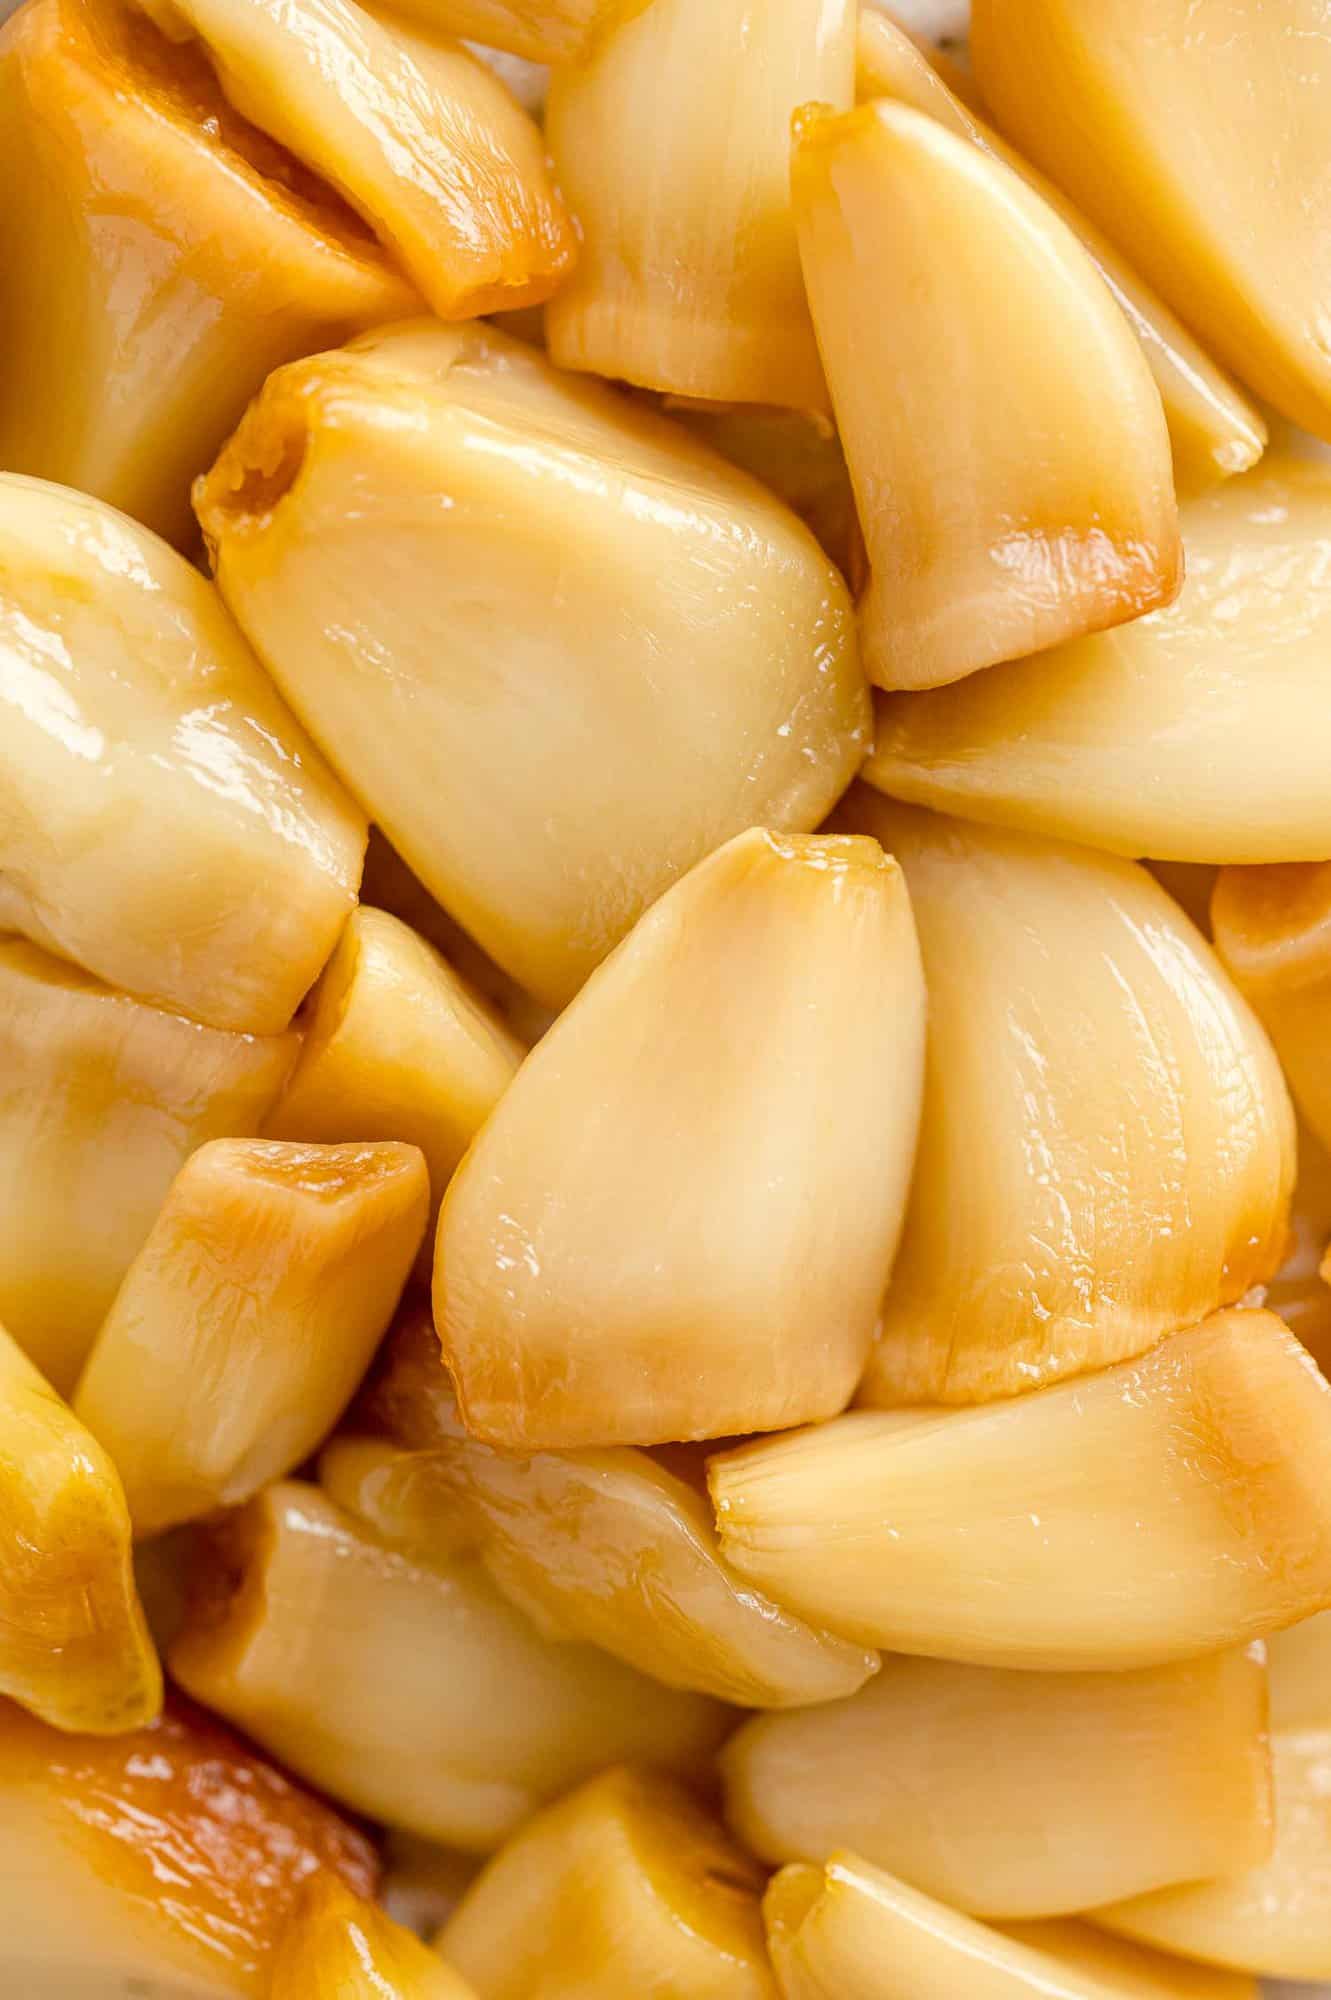
Remove the roasted garlic from the oven and let it cool for about 10 minutes, until you can handle it without burning your fingers. Separate the nail.
At this point, the individual cloves can be peeled to be used whole or stored in olive oil. Or you can squeeze the soft inside out, mash it with a fork and make a spread or paste. It’s up to you. You can do both if you want.
Read on for ideas on how to use roasted garlic and how to store it. Wasn’t that super easy? So much exciting flavor for so little effort!
Common questions
Fresh garlic is very spicy and some people find that it irritates their digestive system. Roasted garlic is mild in taste, almost buttery, and digests more easily.
Why? When you cut a fresh clove of garlic, a chemical reaction occurs that releases the pungent properties. When garlic is roasted, this reaction can no longer occur, making roasted garlic much sweeter and tastier.
Nutritionally, fresh garlic contains a substance called allicin that has significant health benefits. When garlic is roasted or cooked, the allicin content is reduced; However, garlic is still considered a very healthy food, raw or cooked, with good amounts of vitamins and minerals. Garlic has been used for centuries as a medicine for many different diseases.
Ideas for preparing ahead
Roasted garlic can be prepared in advance. Follow the storage tips below to safely keep your garlic fresh.
Storage tips
First, it’s important to say that you should Never store cooked garlic at room temperature. Never! Botulism toxins can form and cause you to get food poisoning.
Raw garlic can be stored at room temperature so don’t worry about it. Dried, uncooked and unpeeled heads of garlic will keep for up to six months in a cool, dry place. Do not put them in a plastic bag; They need air flow. If they start to sprout, discard the green sprouts because they have a bitter taste.
Now, let’s turn our attention back to roasted garlic. Whole roasted garlic cloves can be kept in the refrigerator for up to a week. Peel them and put them in a small jar. Cover the clove with olive oil, place the lid on the jar and refrigerate. God USDA I recommend using them within a week, or freezing them. They will keep in the freezer for several months. Defrost in the refrigerator.
If you crush the garlic cloves, put the garlic paste in a small container, cover with a thin layer of oil and refrigerate. To freeze, I like to use a small ice cube to try. Put a tablespoon or so of the garlic paste in each compartment, freeze until set, then transfer to a freezer-safe container.
By the way, don’t throw away that garlic-scented oil. Use it for salad dressings, bread, etc.
10 ways to use roasted garlic
did you do that? Be sure to leave a review below and tag me @rachelcooksblog Facebook, Instagramor Pinterest!
Dishes
Prevent your screen from going dark
Do you love the sweet buttery taste of roasted garlic? Learn how to roast garlic at home and you can enjoy this delicious (and healthy!) treat whenever you want.
Instructions
Preheat oven to 400ºF.
Cut off the top of a whole head of garlic, so that the individual cloves are exposed, and drizzle with 1 tbsp Olive oil. If desired, sprinkle with salt.
Wrap well in foil (see note) and place on a baking sheet. Roast for 50 to 60 minutes or until softened and golden.
Cool a little until you can handle the garlic. Separate the head from the nail. With your fingers, squeeze from the bottom of the nail to remove the pulp. Alternatively, if you want a whole nail, carefully peel off the outer layer from each nail.
Remarks
- You can use parchment paper instead of aluminum foil if you prefer. Place the garlic on a square of baking paper and gather the edges. Tie the gathered ends with butcher’s twine (kitchen twine).
- To save time and energy, roast several heads of garlic at once. If you have the oven for something else, you can roast garlic at the same time.
- Storage offers: Whole roasted garlic cloves can be kept in the refrigerator for up to a week. Peel them and put them in a small jar. Cover the clove with olive oil, place the lid on the jar and refrigerate. God USDA I recommend using them within a week, or freezing them. Roasted garlic can be frozen for several months. Defrost in the refrigerator. If you crush the garlic cloves, put the garlic paste in a small container, cover with a thin layer of oil and refrigerate. To freeze, I like to use a small ice cube to try. Put a tablespoon or so of the garlic paste in each compartment, freeze until set, then transfer to a freezer-safe container. Garlic paste thaws quickly.
Nutritional information
dose: 3cloves, Calories: 41KKL, Carbohydrates: 2G, protein: 0.4G, Fat: 4G, Saturated fat: 0.5G, Polyunsaturated fat: 0.4G, Unsaturated fat: 3G, sodium: 1mg, potassium: 28mg, fiber: 0.1G, Sugar: 0.1G, vitamin: 1IU, Vitamin C: 2mg, calcium: 13mg, iron: 0.1mg
This site provides approximate nutritional information for convenience and as a courtesy only. Nutritional data is primarily collected from the USDA Food Composition Database, whenever available, or other online calculators.
Source
")

