
A basic sweet and sourdough recipe that makes the best cinnamon rolls, blueberry rolls, sticky buns and more!
Jump to:
Regarding the dough
The enriched dough for these sweet buns is similar to sourdough brioche dough, but it is a slightly less rich dough. It’s easier to work with by hand than with buttery sourdough brioche. There is still the addition of eggs and butter for flavor, just not as much. it does Fluffy Sourdough Cinnamon Buns And a delicious sourdough sticky bun!
You can also use this dough to make fried donuts.
This dough is leavened without commercial yeast, so an active leavening is required for this recipe. It will be fed as a rigid starter. Stiff appetizers have lower moisture, so they take longer to rise. This slow rise provides steady growth with less risk of peaking too early.
The starter is fed (by weight) overnight. 1 part starter, 2 parts flour and 1 part water. This creates a stiff ball of dough. In the morning it will double and be ready for use.
If you haven’t got the sourdough starter yet, learn how to make a sourdough starter.
equipment
A stand mixer with a dough hook will provide the easiest results. The dough can be quite sticky, especially when working with butter, and the extra fat can slow down the gluten development. However, you can still knead the dough by hand but be prepared to put in a little more effort.
Component
The ingredient list amounts are on the printable recipe card at the bottom of this post. Here’s just a rundown of what you’ll need.
- All purpose flour or bread flour – this recipe works well with strong all purpose flour with about 11% protein.
- Active sourdough starter
- Sugar
- Big balls
- Whole milk
- Butter – this can be salted or unsalted butter
- Salt
Baker’s schedule
Here’s a rough outline of the baker’s schedule to get an idea of the timings.
- the night before -Feed your starter
- 9 in the morning – Mix the dough
- 9:30 in the morning – Let it rise in a warm place until it swells by half (about 4-6 hours, depending on the temperature)
- 2:30 in the afternoon – Refrigerate the dough for at least 4 hours or up to 24 hours. After that, the dough can be shaped and let rise a second time until it doubles in volume. Then baked.
method
Mix 30 grams of starter with 60 grams of flour and 30 grams of water. Knead it for a minute or two into a stiff dough ball.
Place it into a lightly greased jar. Brush the top of the ball dough with a little water (so that it doesn’t dry out too much during the night). Cover it loosely with a lid and leave to rise for 8-12 hours until doubled in size.

the following day
mixing in a mixer
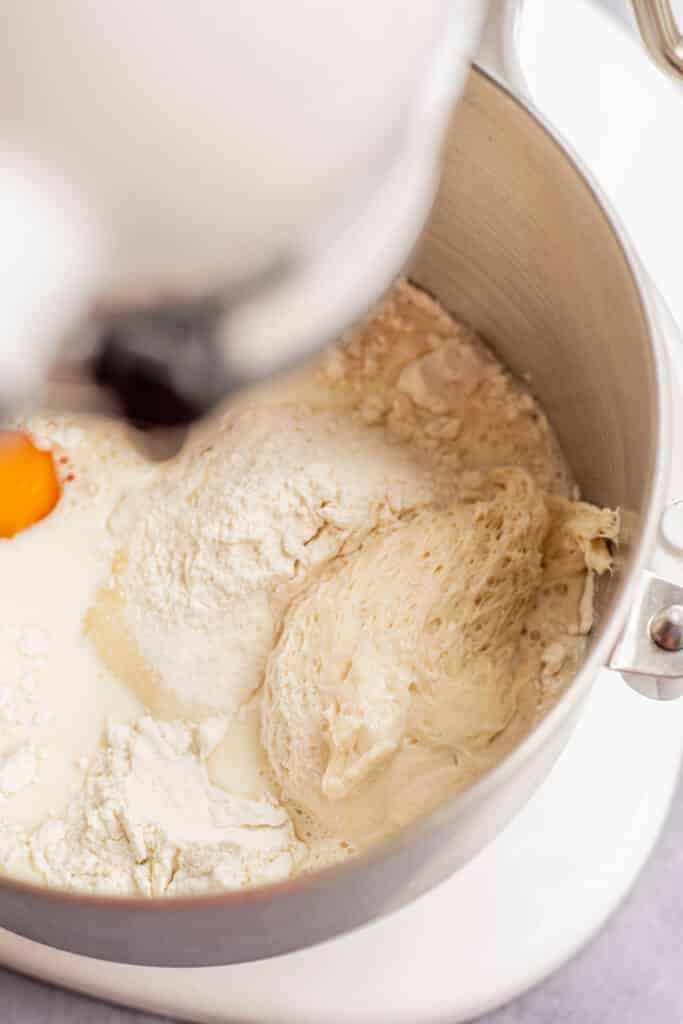
Add the flour, sugar, salt, eggs, milk and all the stiff starter in the mixer bowl fitted with the dough hook.
Turn on the mixer and combine until a thick but slightly sticky dough is formed. Mix the dough at medium-low speed for about 5 minutes to start developing the gluten.

Add the softened butter to your mixer bowl, a little at a time. Combines each cube before adding the next.
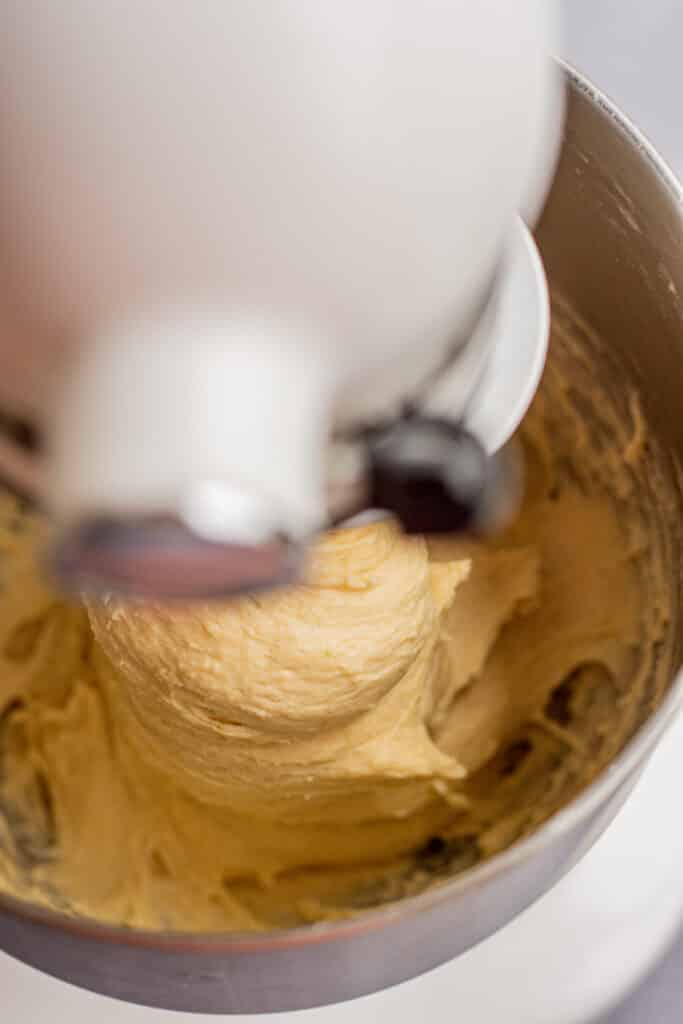
Turn the mixer on medium speed.
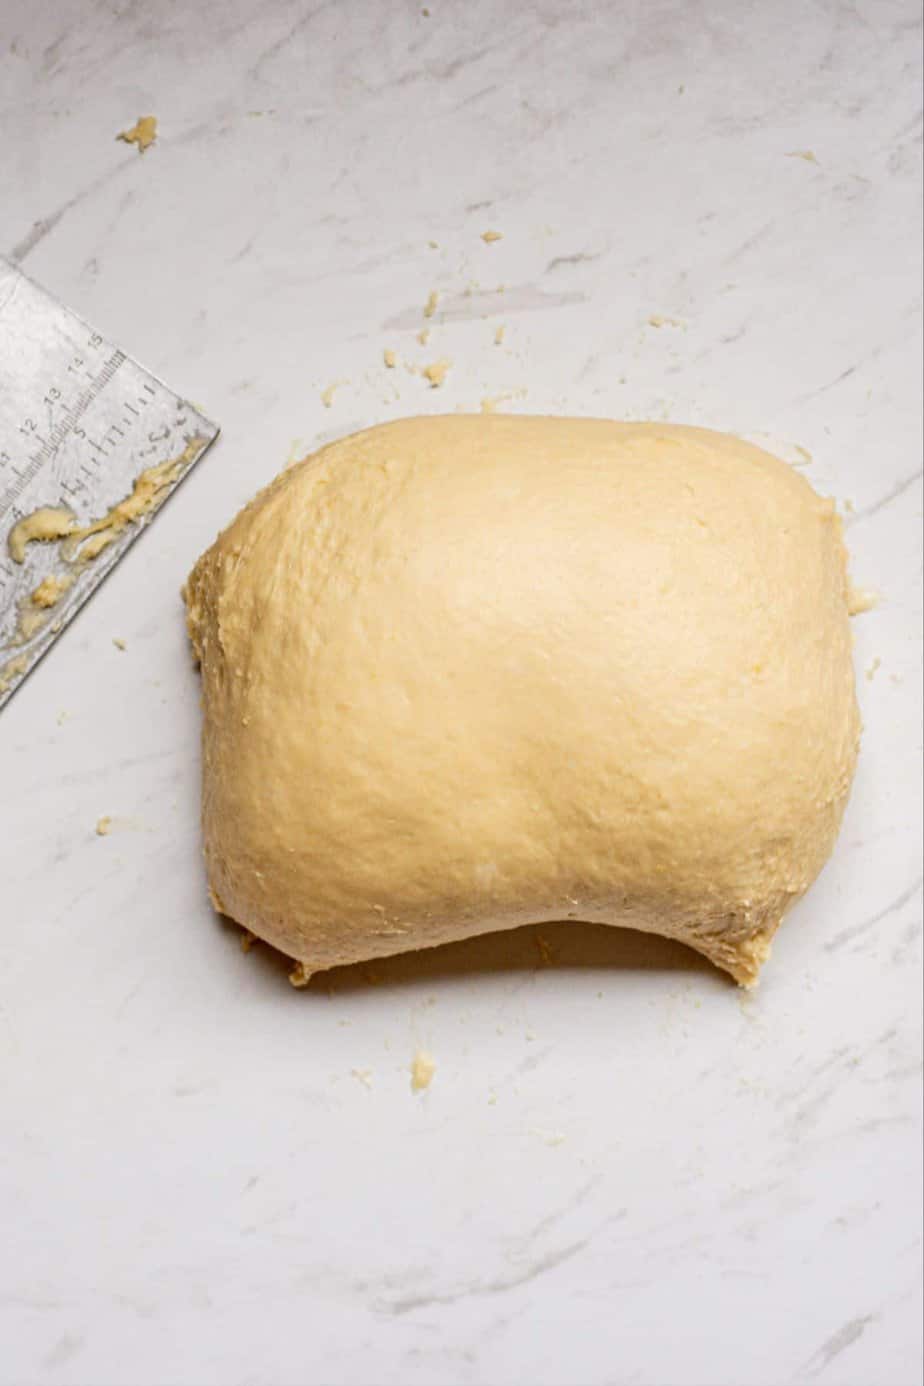
Continue mixing for about 15 minutes until the sticky and soft dough strengthens, comes together and pulls cleanly away from the sides of the bowl.
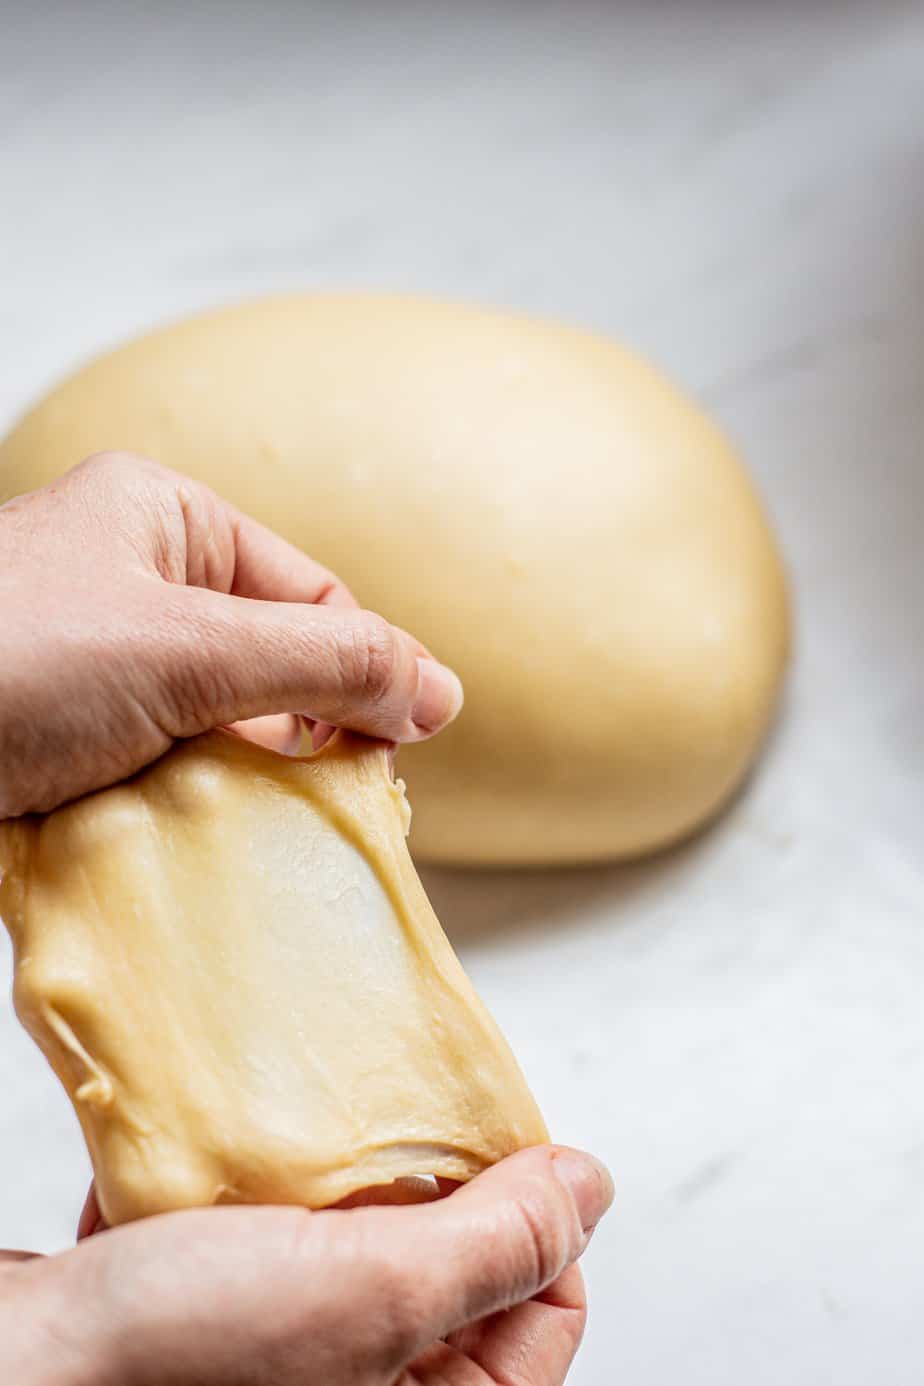
After you’re done mixing, let the smooth dough rest for a few minutes, then grab a piece and see if you can stretch it thin enough that it’s almost transparent, without tearing. This is called the ‘pane window’ effect and shows normal gluten development.
Mixing by hand
Add the flour, sugar, salt, eggs, milk and sourdough starter in a large mixing bowl. Use a fork or wooden spoon to mix it into a shaggy dough. Place the dough on a floured surface and leave it for 5 minutes to develop the gluten.
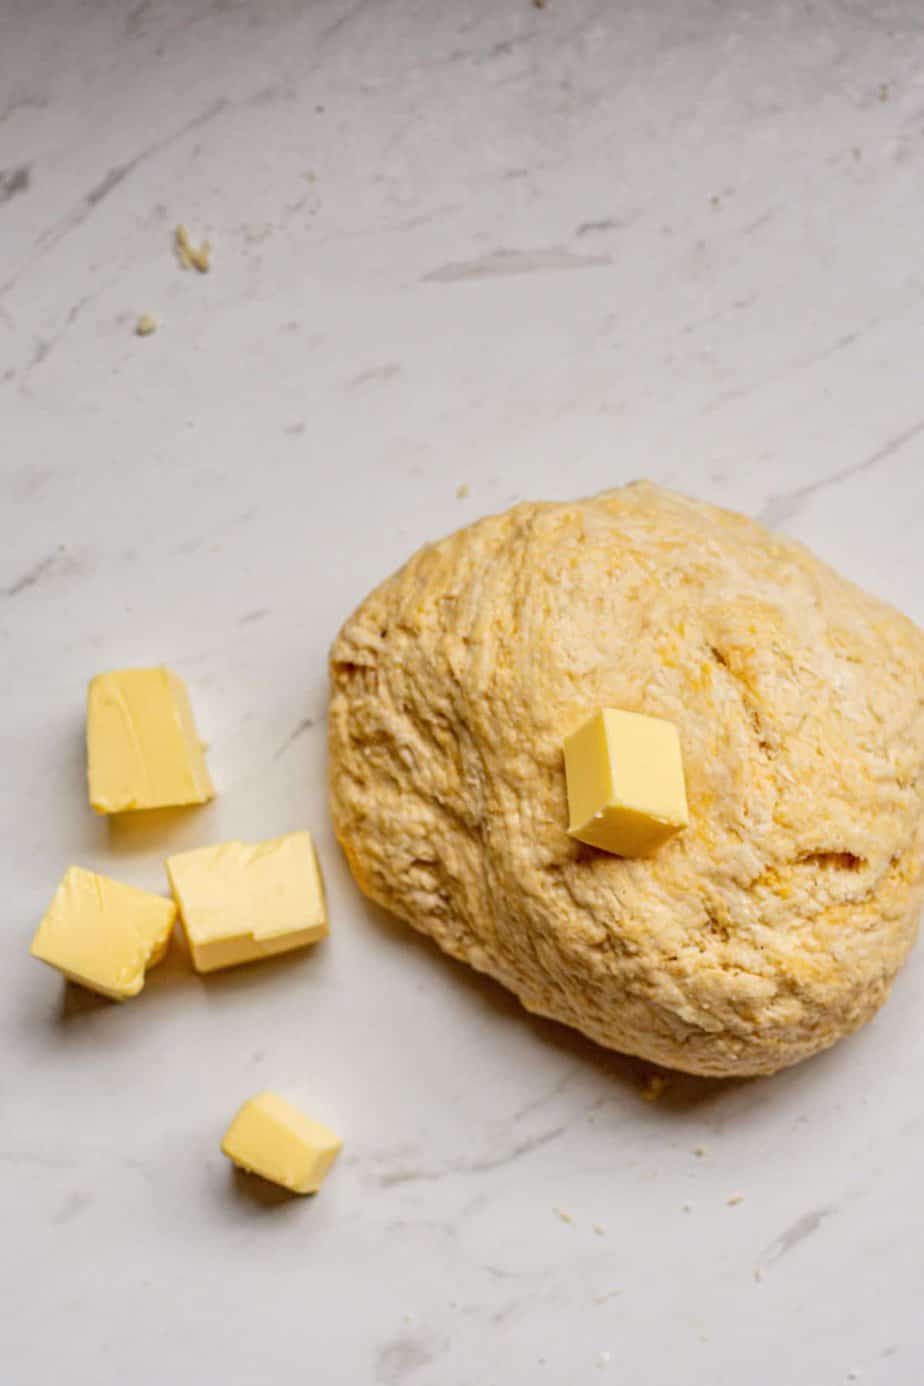
Start kneading in the butter, a few cubes at a time. Pat and fold the dough on the bench to create strength. Pat it down, and fold it.
After all the butter has been incorporated, pat and fold for another minute, then leave the dough to rest for 5-10 minutes, then return to it.
Use a bench scraper to pick up any loose dough pieces. If at any point you need another break, take it!
It’s easier to return to it with clean hands, and the gluten in the dough settles with rest.
bulk fermentation
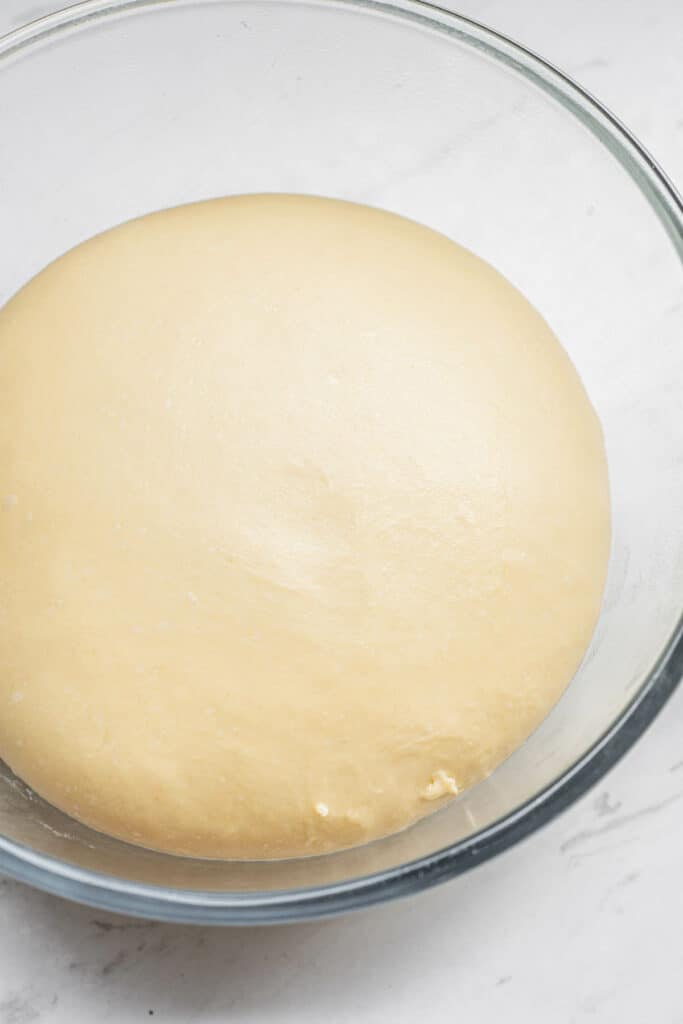
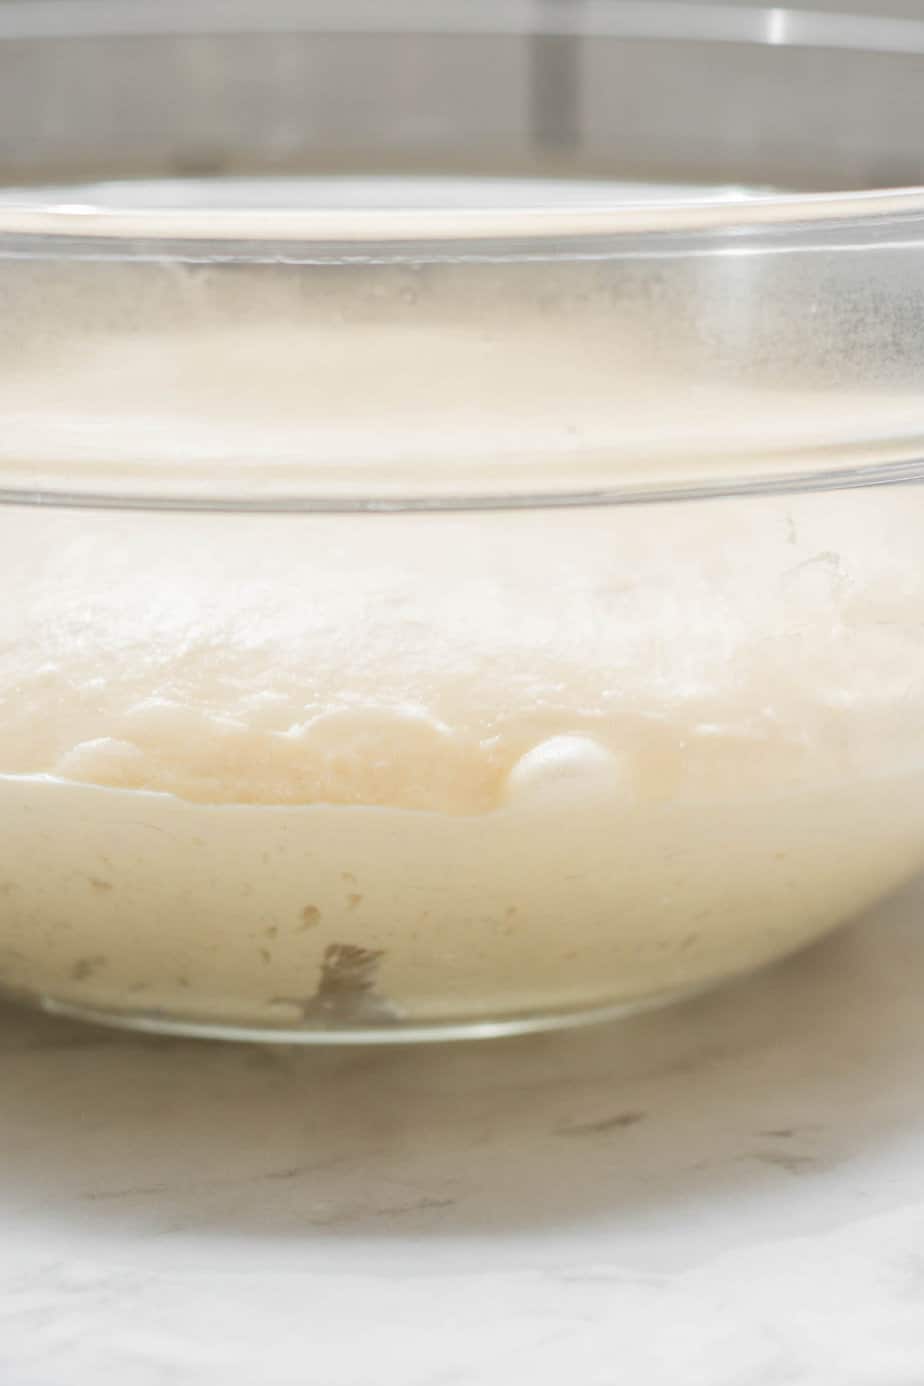
After kneading the dough, it’s time to rise first. Form it into a smooth ball and place it in a large, lightly greased bowl. Cover with a damp towel or plastic wrap. Place the dough in a warm place, ideally around 25°C / 76°F, and let it rise. It will not double but should accumulate by at least 50%.
It will take about 4-6 hours, but the rise time will vary depending on the temperature. You can create a warm, moist spot by placing a large mug of boiling water in a turned off oven and putting the dough in there. Replace the water with freshly boiled water if it cools.
After rising, cover the dough tightly or put in an airtight container and store in the refrigerator until you are ready to shape it.
Final rise and baking
The design and baking of the final dough will depend on how it is used.
This dough is enough to make 12 full rolls.
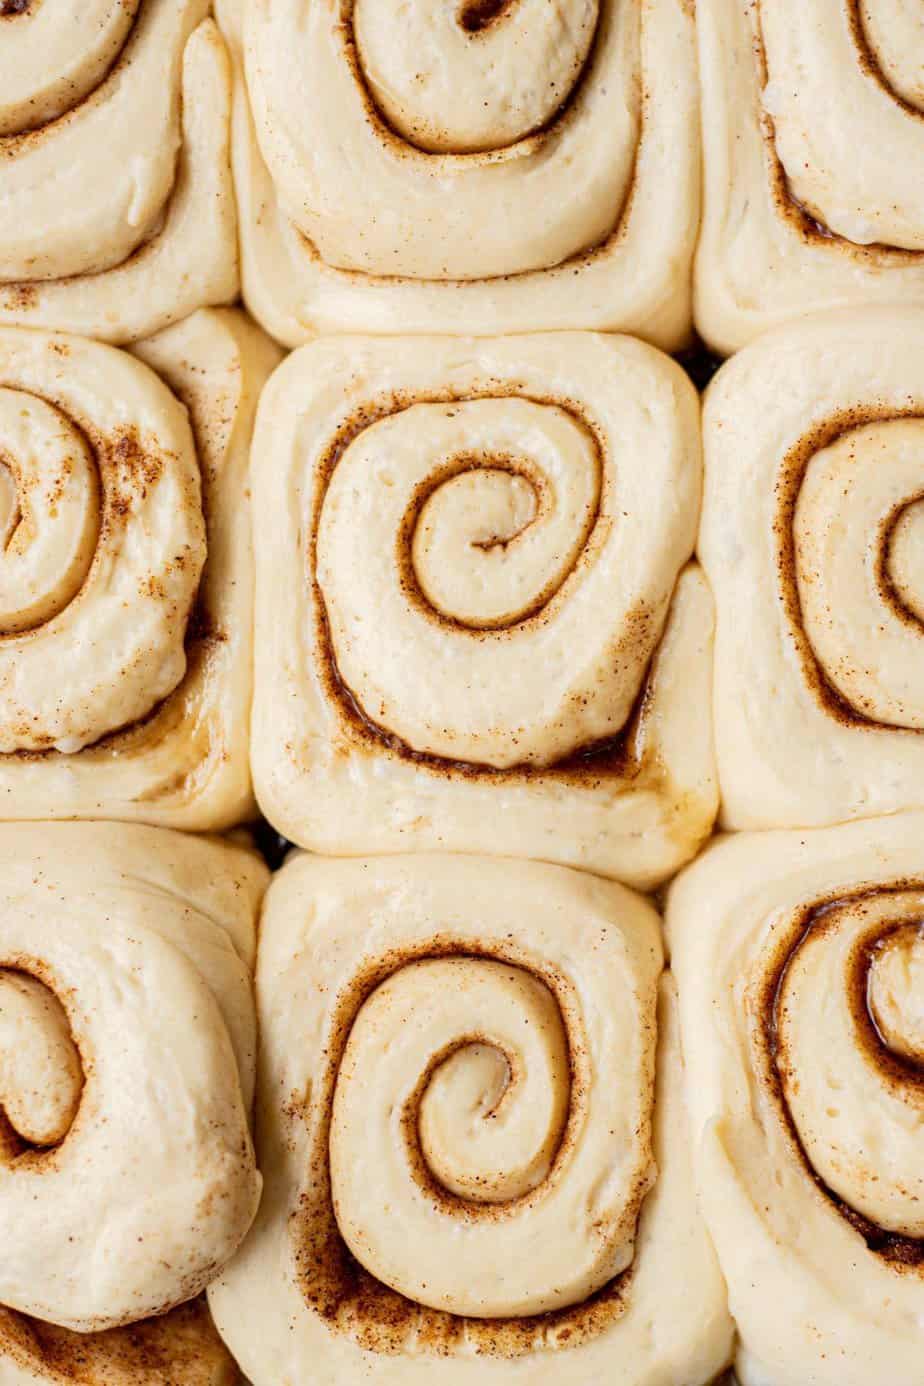
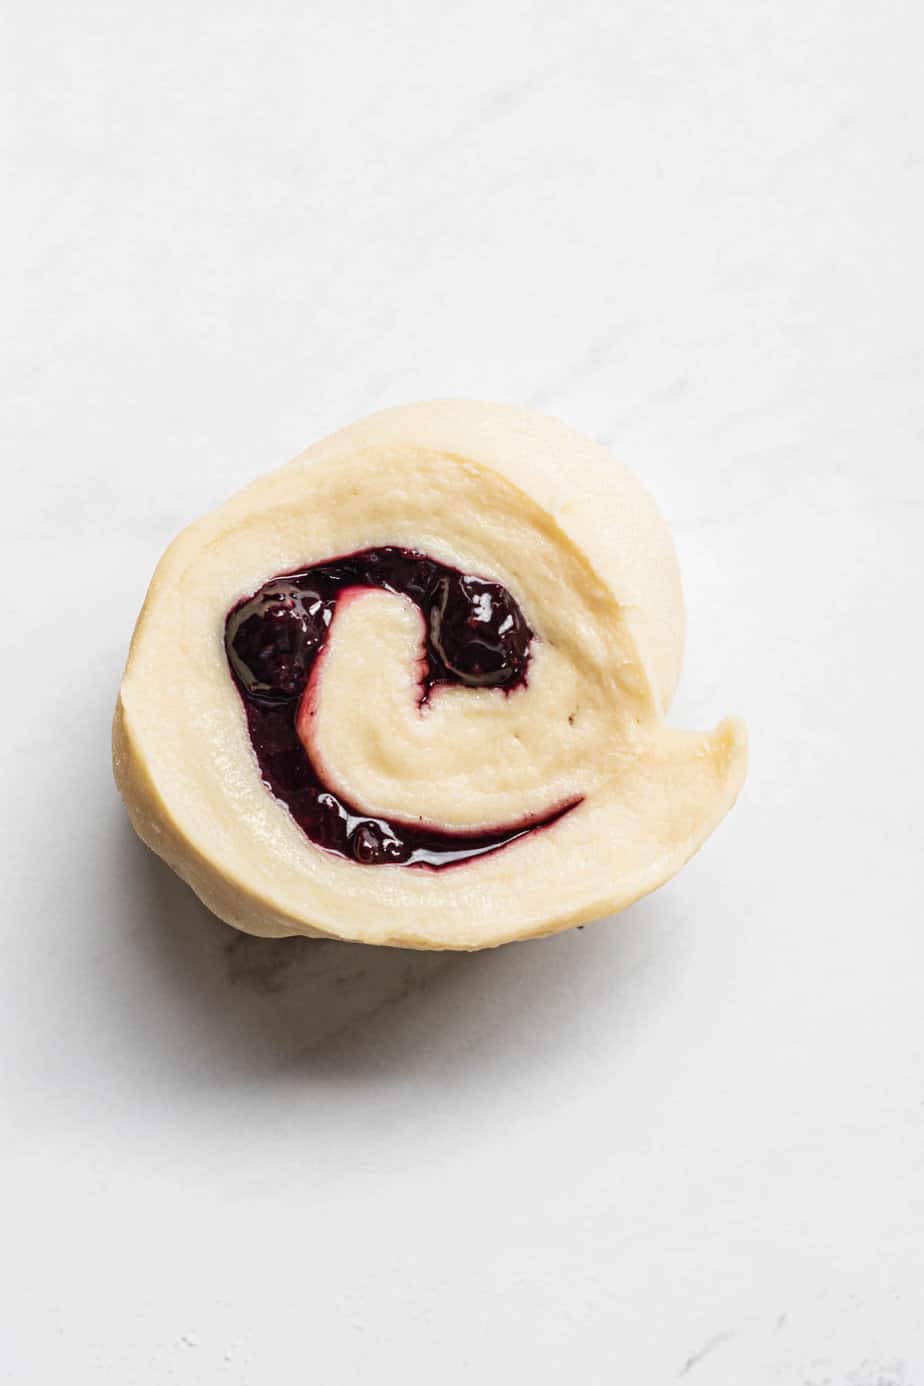
Use a rolling pin to roll the cold dough into a 12×18-inch (30×45 cm) rectangle. Spread it with your favorite filling, then roll it from the long side into a log. Cut with a serrated knife or dental floss into 12 equal pieces.
Grease or line a 9×13 inch baking pan and place the buns in it. Cover the buns with a damp kitchen towel or plastic wrap to prevent the top of the dough from drying out. Let the unbaked buns rise until they double in size.
Then bake.
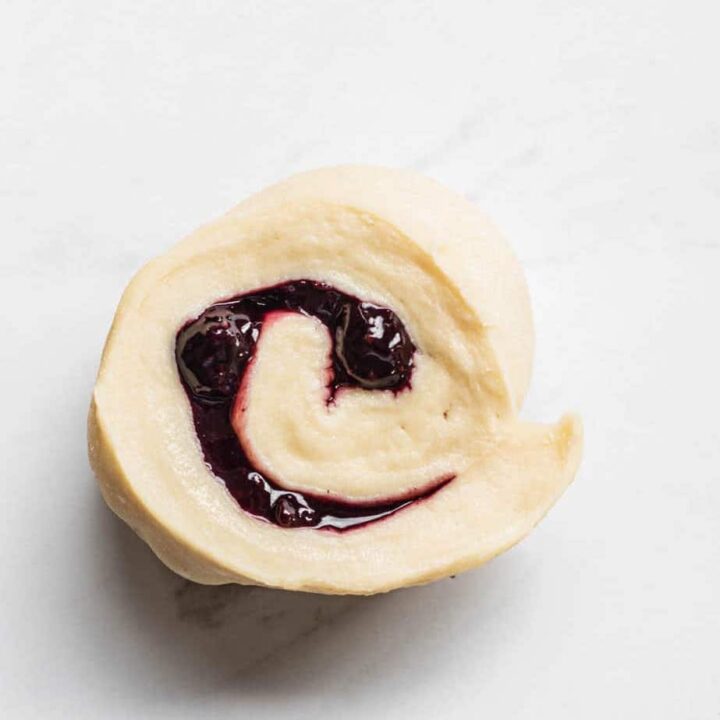
Filling ideas
You can fill these buns with a classic cinnamon sugar mix, or something fruity! Try this basic sourdough with:
More sourdough recipes
Full recipe
A recipe for sourdough sweet dough
yield:
12
Preparation time:
30 minutes
Cooking time:
30 minutes
extra time:
Day 1
total time:
Day 1 1 hour
A basic sweet and sourdough recipe that makes the best cinnamon rolls, blueberry rolls, sticky buns and more!
Component
Hard starter
-
First course 30 grams
-
60 grams of all-purpose flour
-
30 grams of water
dough
-
500 grams of strong all-purpose flour with about 11% protein
-
50 grams of granulated sugar
-
2 large eggs
-
200 grams of milk
-
All the stiff starter
-
8 grams of salt
-
100 grams of unsalted butter, softened to room temperature, cut into cubes
Instructions
the night before
- Mix 30 grams of starter with 60 grams of flour and 30 grams of water. Knead it for a minute or two into a stiff dough ball.
- Place it into a lightly greased jar. Brush the top of the dough with a little water (so that it doesn’t dry out too much during the night). Cover it loosely with a lid and leave to rise for 8-12 hours until doubled in size.
The day after
- Add the flour, sugar, salt, eggs, milk and all the stiff starter in the mixer bowl fitted with the dough hook.
- Turn on the mixer and combine until a thick but slightly sticky dough is formed. Mix the dough at medium-low speed for about 5 minutes to start developing the gluten.
- Add the softened butter to your mixer bowl, a little at a time. Combines each cube before adding the next.
- Turn on the mixer on medium speed and continue to mix for about 15 minutes until the sticky and soft dough strengthens, comes together and pulls cleanly from the sides of the bowl.
- After you’re done mixing, let the dough rest for a few minutes, then grab a piece and see if you can stretch it thin enough that it’s almost transparent, without tearing. This is called the ‘pane window’ effect and shows normal gluten development.
- See the full post above for instructions on mixing the dough by hand.
- After kneading the dough, shape it into a smooth ball and place it in a lightly greased bowl. Cover with a damp tea towel, plastic wrap or a lid. Place the dough in a warm place, ideally around 25°C / 76°F, and let it rise.
- It will not double but should accumulate by at least 50%. It will take about 4-6 hours, but the rise time will vary depending on the temperature. You can create a warm, moist spot by placing a large mug of boiling water in a turned off oven and putting the dough in there. Replace the water with freshly boiled water if it cools.
- After rising, place the dough in the refrigerator for at least 4 hours or up to 24 hours.
Design and baking
- After proofing the refrigerator, you can shape the cold dough and fill it with your favorite filling (see post for filling ideas).
- Use a rolling pin to roll the cold dough into a 12×18-inch (30×45 cm) rectangle. Spread it with the filling, then roll it into a log on the long side. Cut with a serrated knife or dental floss into 12 equal pieces.
- Grease or line a 9×13 inch baking pan and place the buns in it. Cover the buns with a damp kitchen towel or plastic wrap to prevent the top of the dough from drying out. Let the unbaked buns rise until they double in size. It can take about 5-8 hours in a warm place.
- They can also be designed in the late evening to rise overnight for 8-10 hours if your kitchen is not too hot.
- Once risen, bake at 375°F (190°C) for 28-30 minutes until golden brown.
Recommended products
As an Amazon Associate, Mighty Ape Partner, and member of other affiliate programs, I earn from eligible purchases.
Nutritional information:
yield: 12
Serving size: 1
Quantity per serving:
Calories: 275Total fat: 8 gramsSaturated fat: 5 gramstrans fat: 0 gramsUnsaturated fat: 3 gramsCholesterol: 51 mgsodium: 284 mgCarbohydrates: 41 gramsfiber: 1 gramSugar: 5 gramsprotein: 9 grams


