


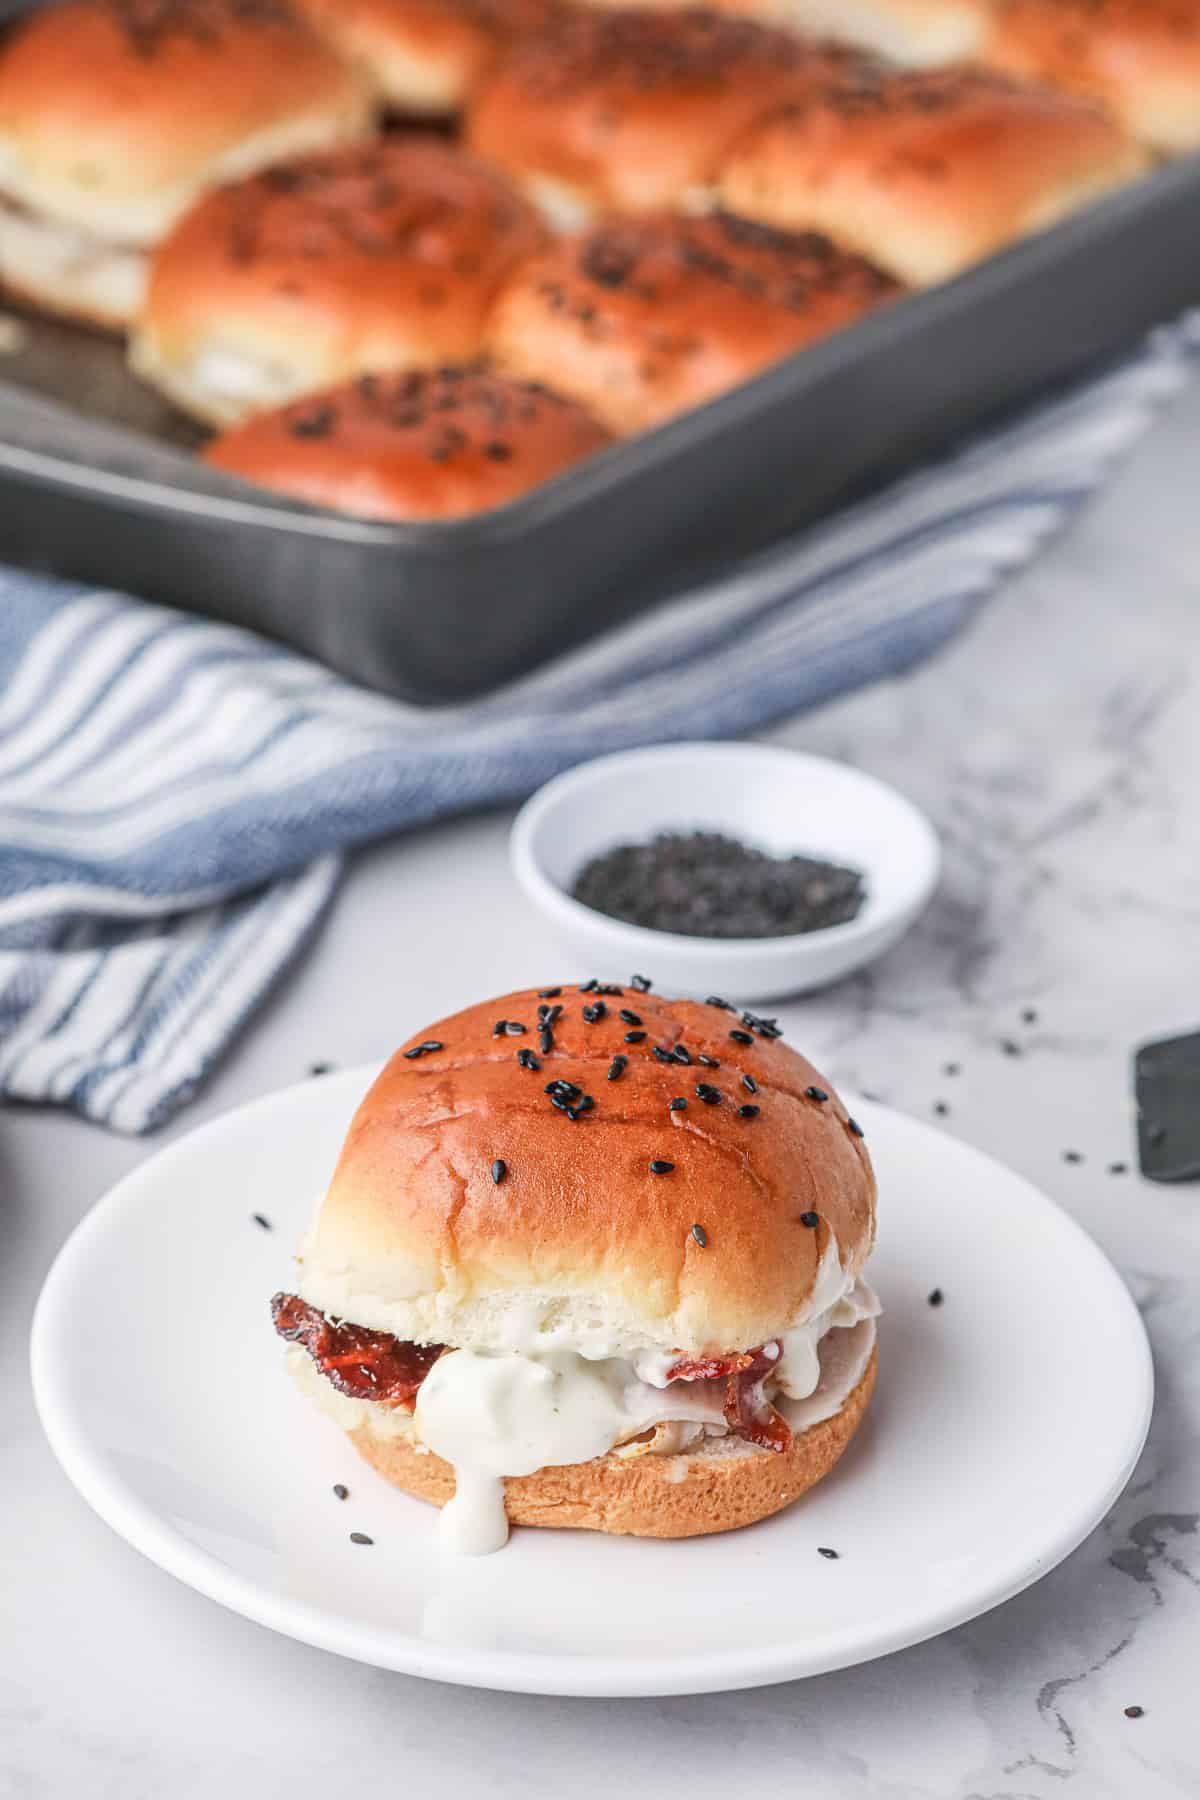
Turkey Bacon Ranch Sliders are so easy to make and ready in about 30 minutes! These savory turkey sliders are loaded with thick-sliced bacon and blue cheese-ranch sauce.

I knew right away the first time I made these Easy Turkey Deli Sliders that I was onto something. Boy, was I right. It’s hard to go wrong with this short but flavorful ingredient list.
Turkey Bacon Sliders are perfect for a light lunch or dinner or really, any time of the day or night.
When my guys were in high school, I used to make batches of recipes like this and freezer-friendly Beef and Bean Burritos to keep on hand during the summer months. I would have a quiet house and the next moment there would be a bunch of hungry teenagers looking for food. These roving bands of adolescent boys could appear at any time.

And here’s something you may or may not know about teenage boys. They are always hungry. It really has very little to do with when they last ate, a fact that never ceased to amaze me. As they walked towards the pantry late that day, I would say “Don’t eat now, it will ruin your appetite for dinner!”. They just laugh, knowingly, like I’m off my rocker.
There seems to be no such thing as destroying a teenage boy’s appetite.
Ingredient notes
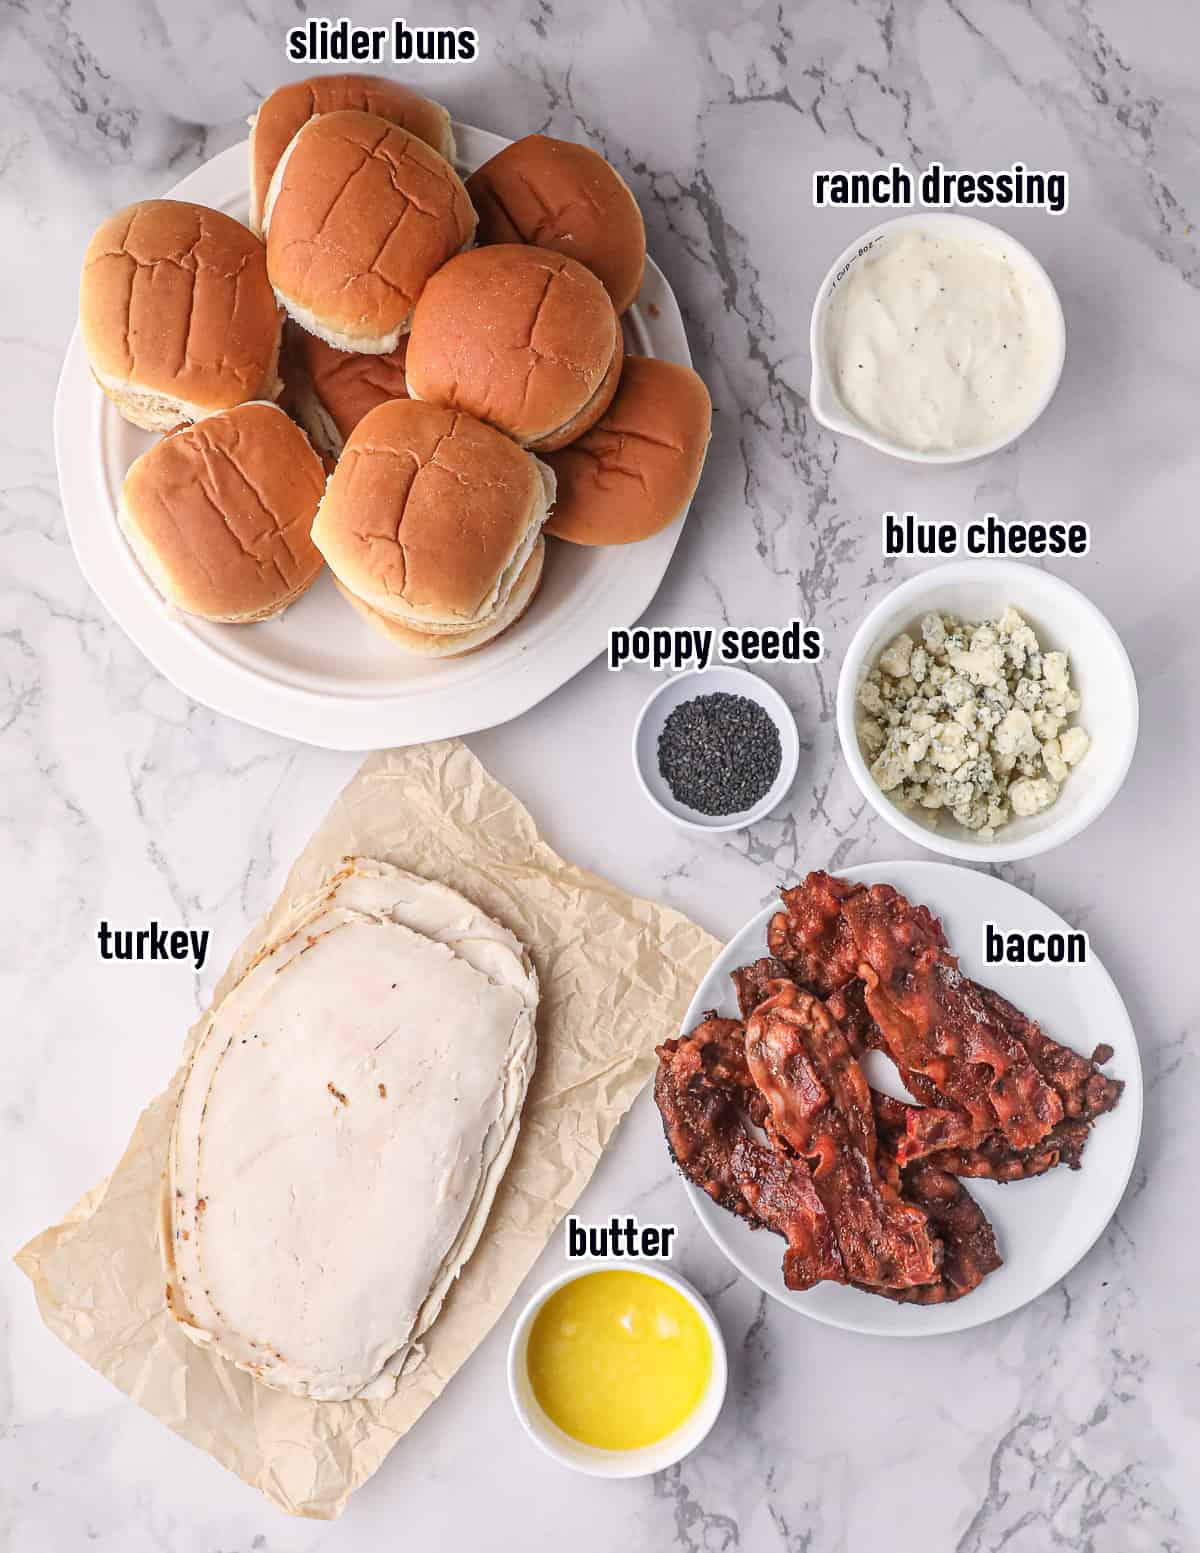
- Outdoor salad dressing – Your favorite ranch dressing in a bottle. easy! Or mix your own with a ranch seasoning packet.
- blue cheese – crumbled blue cheese is a great flavor addition to ranch and bacon! I like to use a milder gorgonzola cheese for these sliders.
- Slider rolls – Instead of the small Hawaiian rolls that have to be sliced in the middle, I like to use slider rolls that come pre-sliced and are just a little bit bigger. It’s easier and they create slightly more meaningful sliders.
- Deli turkey meat – Thinly sliced turkey from the deli counter. You can also use leftover turkey from a holiday dinner, sliced as thin as possible.
- Bacon – Thick sliced bacon makes a big impact. See below for instructions on how to cook bacon in the oven.
- Coating – Melted butter and also poppy seeds or sesame seeds add a little interest to the top of the buns.
Cooking bacon in the oven
- Heat the oven to 400 degrees Celsius and line a rimmed baking sheet with foil. You can use parchment paper, if you prefer, or even leave the baking sheet uncovered.
- Place the bacon in an even layer and transfer the baking pan to the oven. Bake for about 15 minutes or until they are nicely crispy. Thick sliced bacon may take a minute or two longer.
- Remove the pan from the oven and transfer the bacon to absorbent paper to drain. It works like a dream and cleanup is a breeze. Just throw away the foil or parchment paper, give the pan a quick rinse and you’re done!
How to make Turkey Bacon Ranch Sliders
Before assembling the sliders, add the ranch dressing and blue cheese crumbs to a small bowl and mix to combine.
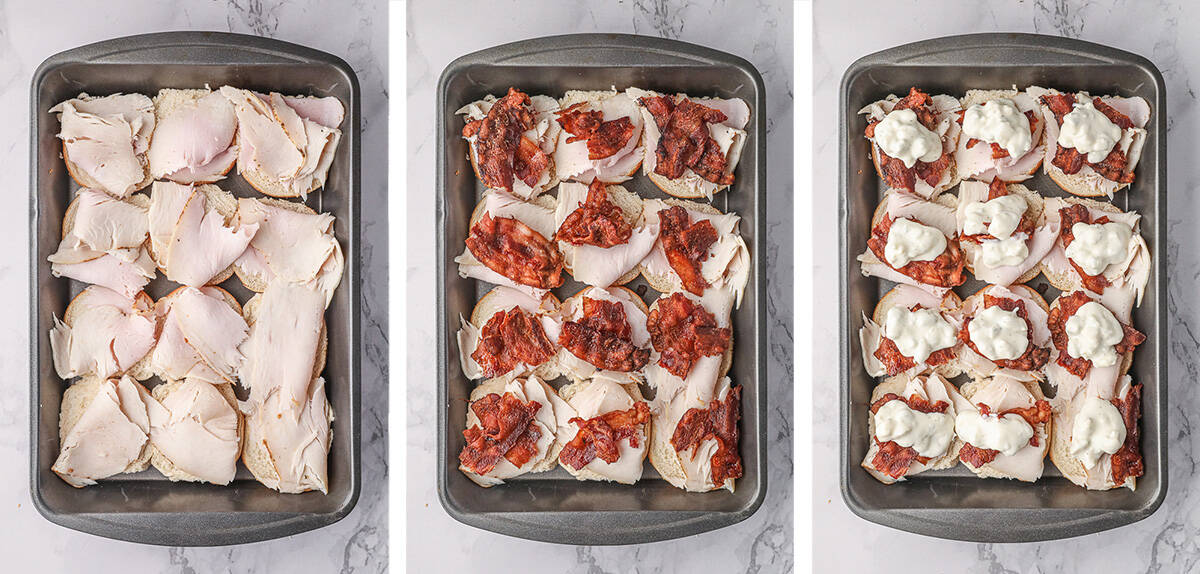
- Place the bottom halves of the slider buns in a large baking dish and top with turkey.
- Tear the pieces of bacon in half and place on top of the turkey, crosswise (1 slice per sandwich).
- Top each slider with a spoonful of the blue cheese ranch dressing.
Save the remaining blue cheese ranch dressing to serve with the sliders for dipping!
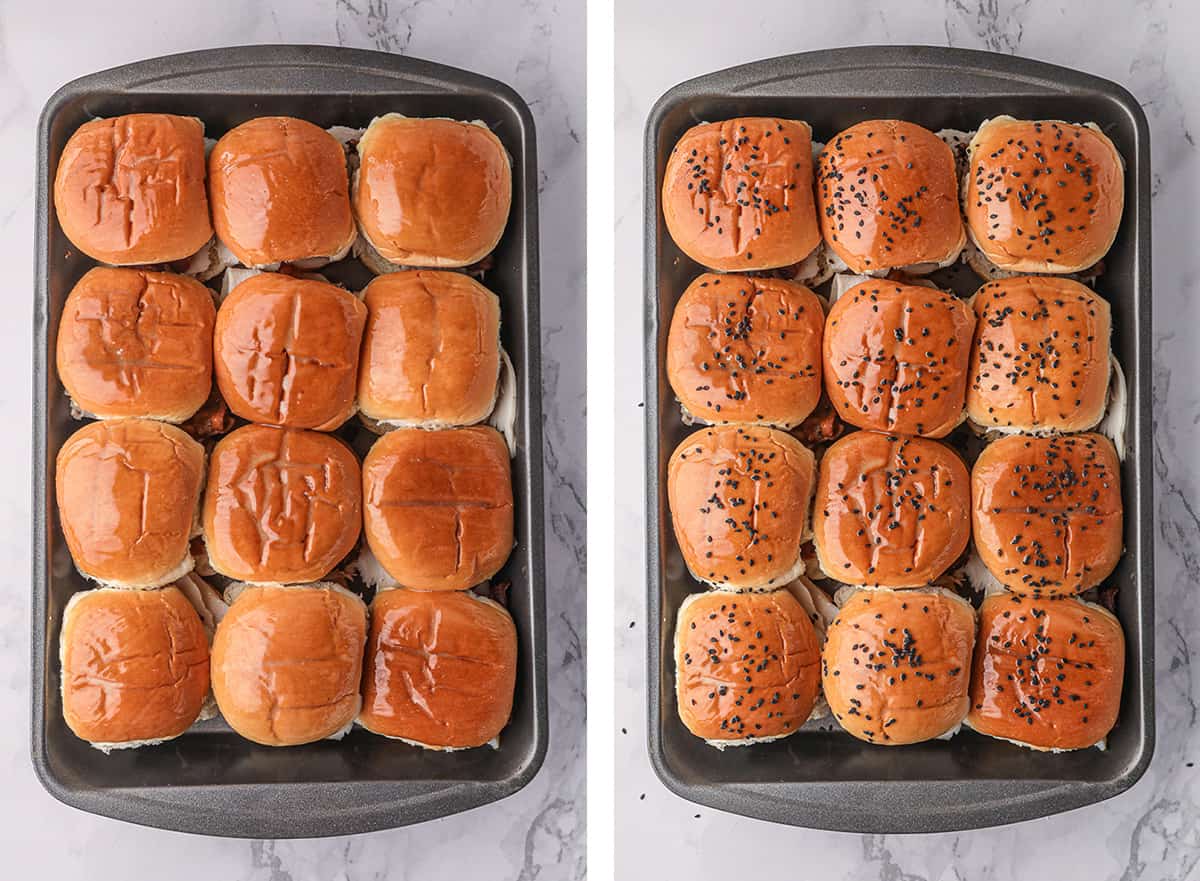
- Cover the sliders on top of the buns and brush them with a little melted butter.
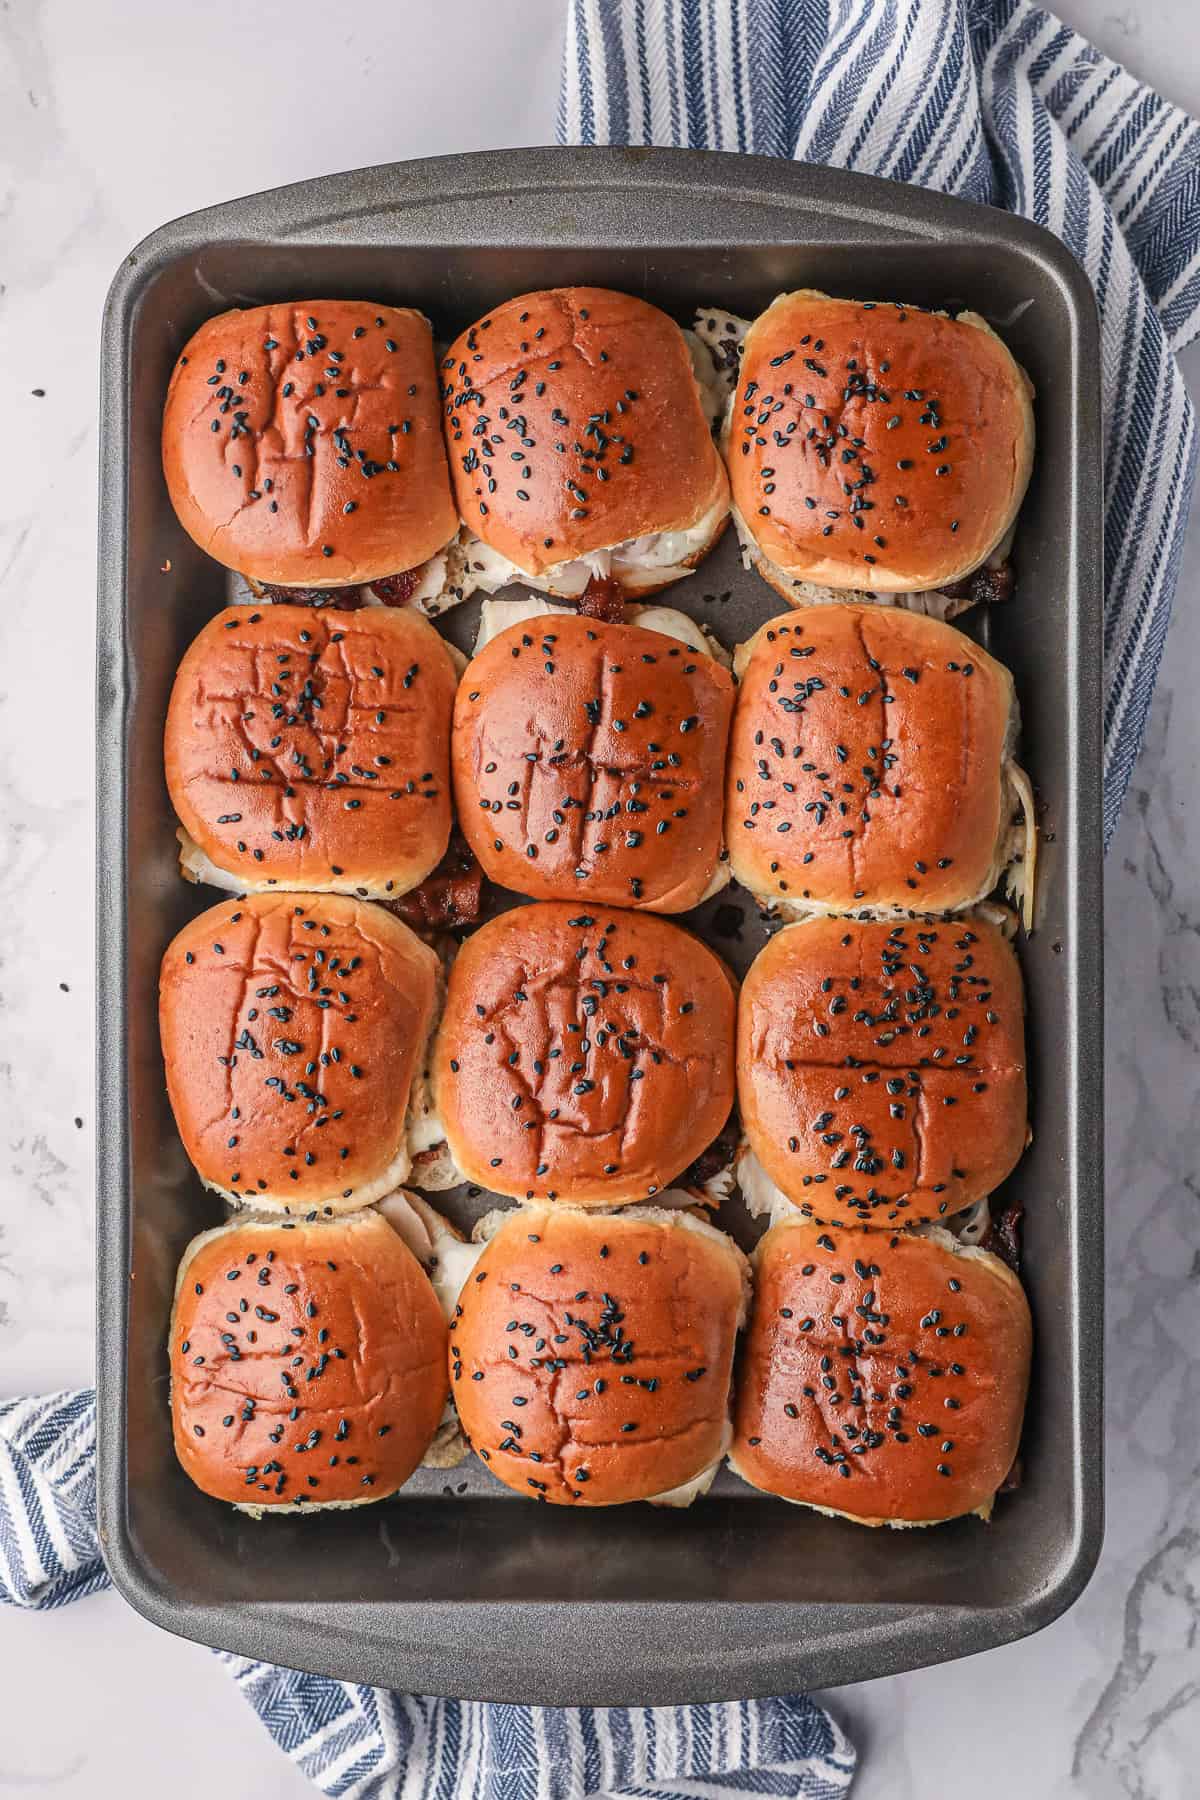
- Sprinkle poppy seeds or sesame seeds on top. Cover the baking tray with foil and bake for 10 minutes. Remove the foil and continue baking for another 5 minutes, or until lightly toasted.
Storage tips
Turkey Bacon Ranch Sliders are great in the microwave for a light lunch or afternoon snack.
- cool: Just cover them with plastic wrap or aluminum foil or transfer them to a ziplock plastic bag. They will keep well, refrigerated, for 2 to 3 days.
- Residue heating: Heat the sliders for about 30 seconds, or just until they heat up. You can heat a whole dish, covered, in an oven preheated to 350 degrees for about 10 minutes.
More slider recipes you will love
Sign up for my free newsletter for all the latest recipes and join me Facebook, Instagram and Pinterest For more cooking inspiration!

Turkey Bacon Ranch Sliders
Turkey Bacon Ranch Sliders are so easy to make and ready in about 30 minutes! These savory turkey sliders are loaded with thick-sliced bacon and blue cheese-ranch sauce.
Dishes: 12 Indicators
Component
- 1 Goblet Outdoor salad dressing
- ½ Goblet Crumbled blue cheese, I love gorgonzola
- 12 Slider rolls
- ¾ pound Thinly sliced turkey delicacies
- 12 pieces thickly sliced bacon, cooked
- 2 spoons butter, dissolved
- 1 tablespoon Poppy or sesame
Instructions
Make the blue cheese ranch dressing
Assemble the sliders
-
Place the bottom halves of the slider buns in a large baking dish. Divide the turkey evenly between the buns. Tear the pieces of bacon in half and place on top of the turkey, crosswise (1 slice per sandwich). Top with a dollop of the blue cheese ranch dressing. Cover the sliders with the upper halves of the buns.
-
Use a pastry brush to coat the tops of the buns with melted butter and then sprinkle with poppy seeds or sesame seeds.
Bake and serve
-
Cover the baking tray with foil and bake in a preheated oven for 10 minutes. Remove the foil and continue baking for another 5 minutes, or until lightly toasted. Remove from the oven and serve with the remaining ranch/gorgonzola mixture on the side for dipping.
diet
dose: 1 the slider · Calories: 394 KKL · Carbohydrates: 19 G · protein: 13 G · Fat: 29 G · Saturated fat: 9 G · Polyunsaturated fat: 8 G · Unsaturated fat: 9 G · trans fat: 0.1 G · Cholesterol: 52 mg · sodium: 753 mg · potassium: 210 mg · fiber: 1 G · Sugar: 4 G · vitamin: 122 IU · Vitamin C: 0.01 mg · calcium: 77 mg · iron: 1 mg
Nutritional information is automatically calculated using generic ingredients, and is an estimate not a guarantee. For more accurate results, please refer to your ingredient labels at home.
This post was originally published on July 7, 2012. It has been updated with new text and images.


